
In my review of the otherwise amazing Hagrid’s Hut set in 2019 I commented on the open back, which is good for playability and doesn’t detract from displays where generally viewed from the front. But for various reasons some may like to add a back to it. So last month I sat down with some extra bricks to look for solutions.
Background
By far the most LEGO sets are made for playing, though an increasing proportion is targeting adult collectors. But most sets are still targeting kids – and is centered around playability.
For that reason, LEGO designs buildings that either open up, like the 2010 Hagrid’s Hut (set 4738), or have open backs (and sometimes sides), with the new 4 Privet Drive being a very recent example. Similarly, we have increasingly seen opening sides of vehicles too, which we saw for the carriage in the 2018 Hogwarts Express and the 2019 Knight Bus and Beauxbaton’s Carriage sets as well.
The 2019 Hagrid’s Hut (set 75947) is no exception having an open back. As long as displayed viewable from the front only, it is hardly noticeable though.

But if you want to use your building for a display viewable from multiple sides or simply for completeness (OCD can be a burden at times), you may want to add a back to it. So for those looking for inspiration, here is an example of how to do that for the Hagrid’s Hut set.
Design considerations
Before I started, I thought about my objectives and came up with the following design principles:
- The building should look complete from all sides.
- Any additions should use the same style as the base set.
- It should be easy to open and get access to the interior.
Three first two bullet points were easily addressed, but the latter one led to an additional consideration. How should it be designed so the walls easily could be removed?
Having considered (and trialed) hinged walls, I ended up with removeable walls, with the challenge then being how to keep them firmly in place and yet easy to remove. I settled on attaching them on a few studs, which seems to keep them stable enough to allow the model being moved around without the risk of falling apart.
And while the main focus was on adding the back, I wanted to make a few cosmetic changes too, hiding the exposed Technic beams on the sides.
Let’s get building
Firstly, I needed some bricks. I know others have made similar changes by buying two sets (costly of you don’t need doubles of the figures). While I had a decent supply of bricks already, I needed to order a few special ones to ensure I could finish the floor, walls and roof using correct colours. I ordered those from Bricklink.com.
The modifications were split into five parts as covered below.
Change 1 – Finish the roof
This part was simple enough. Create another three roof sections each for the smaller and the larger building, using the existing roof sections as template.

Change 2 – Hiding exposed beam
One the side of the smaller of the two connected buildings, the exposed dark bluish grey Technic beam annoyed me. A blue Technic pin (with stud on one side) and a 1×4 tile fixed this.


Note that the tile is easily bumped out of position as only connected in the centre. Removing one of the existing pins and replacing it with another of the smaller blue ones, will allow it to sit firmly in place.
Change 3 – Adding the back to the smaller building
I built up the floor and walls to be added to the smaller of the two connected buildings. The photos below show the inside and outside of the additions.


Next up I needed to attach the floor to the existing building. The next photos show it all ready to be attached and to the right where the floor has been attached.


It can be seen the how the walls are attached to the two 1×4 modified plates with studs on each end.
The photo below shows the floor from underneath.

And here is the smaller building complete with walls and roof in place.

Change 4 – Adding the back to the larger building
This is somewhat a repeat of what I did for the smaller building, just in bigger scale. First I built up the floor and walls for the addition. The photo below shows the floor expanded.
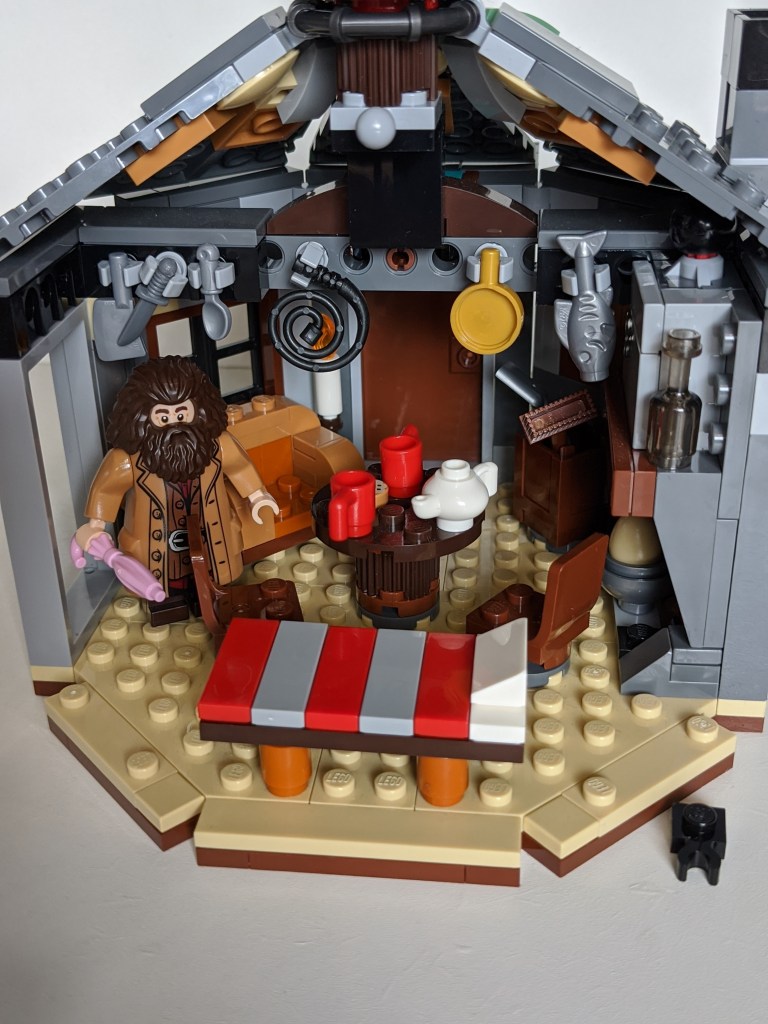
I had to remove the 1×1 clip which held the broom as it otherwise to collide with the walls. I put the broom in the crate along with the shovel instead. And as seen, I’ve added a simple bed for Hagrid. I’ll probably come up with a better design in the future – but for now it will have to do.
The photo below shows the floor from below to better show the pieces used for this.

And here is the building with the walls I have built attached. The walls can be seen in more detail further down in the section showing the completed model.

Change 5 – Adding chimney to cover exposed beam
Similar to the smaller building, the larger one has an exposed Technic beam on the side. That side also feature a rather large panel with a sticker, which breaks the style used for the other walls of the hut. So I decided to add an outside chimney to cover both up – attaching it to the Technic beam to hold it all in place.


Relocating the exiting top of the chimney to the new addition finishes the modification.
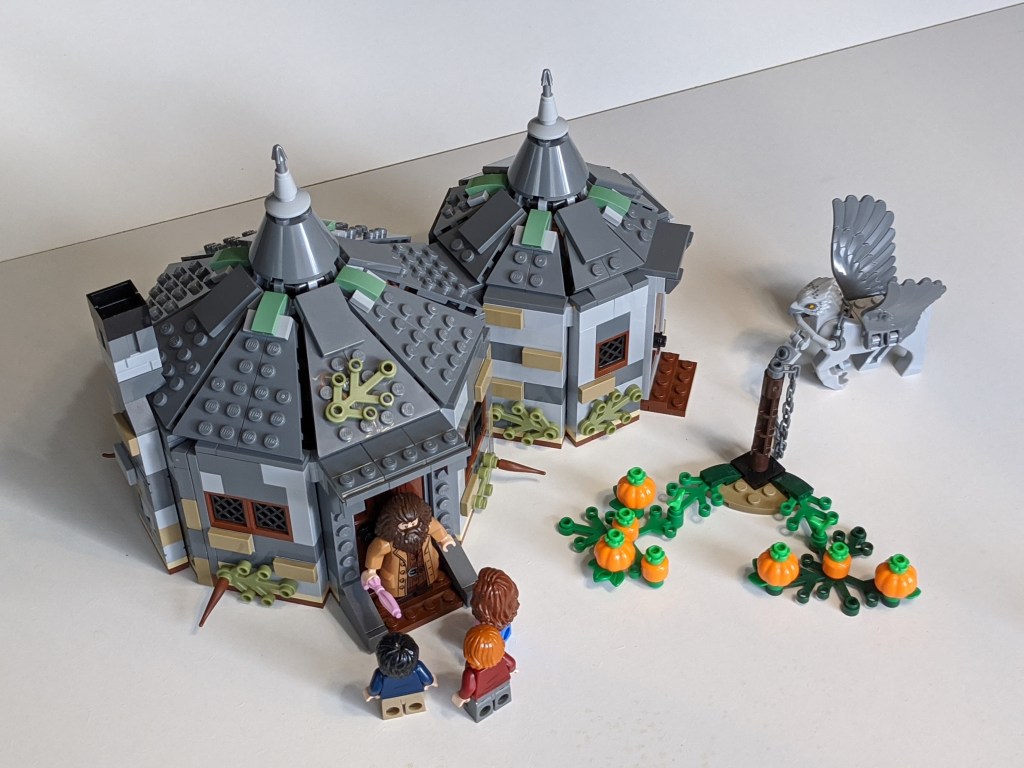
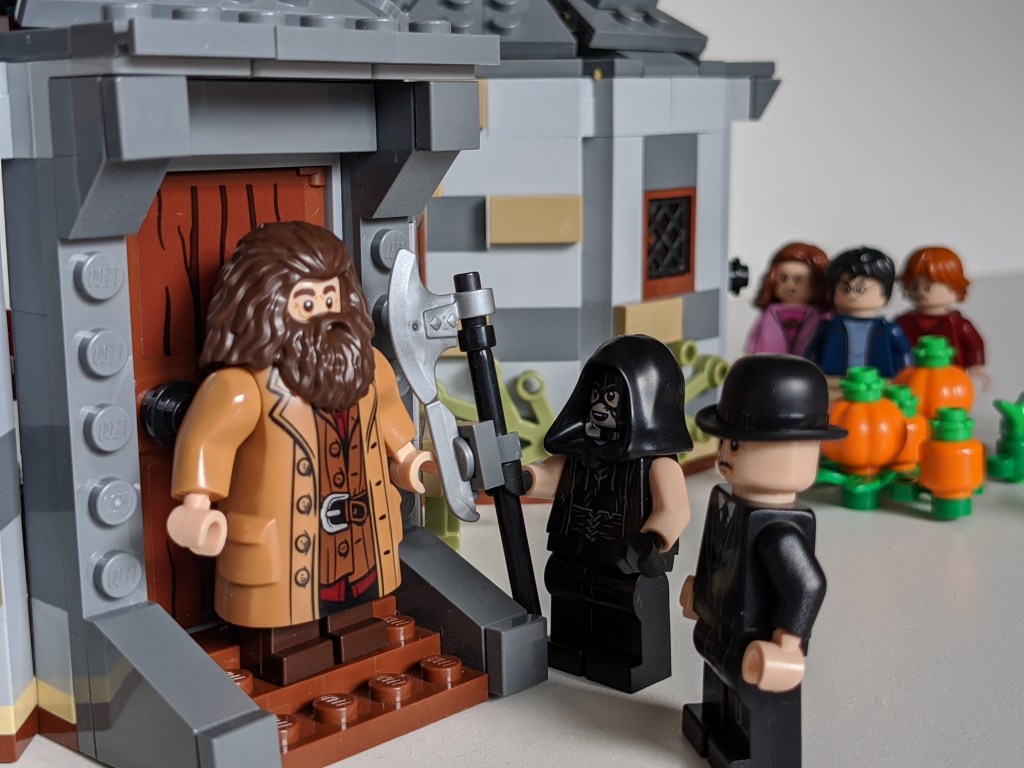
The completed model
Overall, the conversion is fairly easy, and successfully (I think) both improved the visual appearance while keeping access to the interior relatively easy.

Below, I have added a couple of photos of the completed model.

I hope you have found this example of modifying a set interesting and maybe even useful. I’ve tried documenting it with sufficient pictures should help others, who might want to embark on a similar journey. Did you find it helpful? Please let me know in the comments. Any other models you would like me to discuss?
I’ll now return to the 2020 Harry Potter sets, which officially are due to hit the shelves in USA 1 August. But before that, there is a birthday coming up too. So I’ll be back shortly.
Till then, Build the Magic!

2 thoughts on “Adding a removable back to Hagrid’s Hut”