
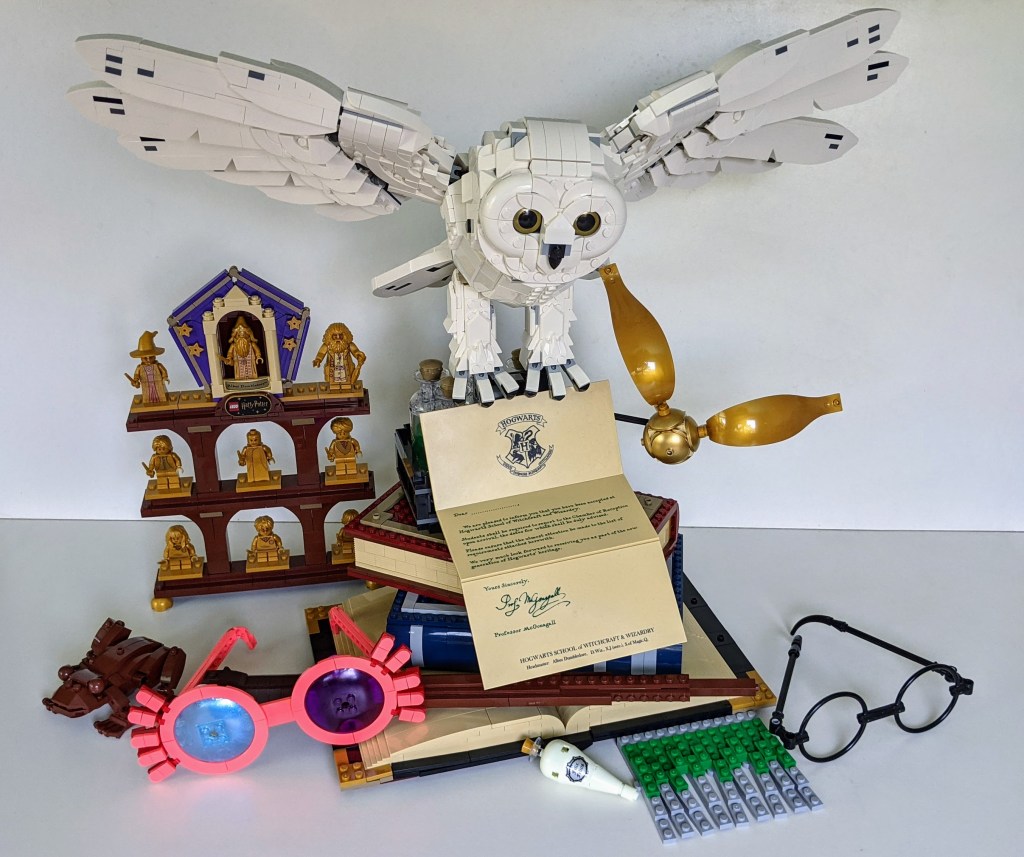
Movie characters sometimes have a piece of clothes or another personal item that becomes characteristic for them. One such example is Luna Lovegood’s Spectrespecs, which were also used on the very first Luna Lovegood LEGO minifigure. While available in minifigure scale, with the new Hogwarts Icons set out, I thought it would be nice with a full-sized version. So this is what I did…
My daughter wanted to dress up as Luna Lovegood for a school event, so we started planning the outfit and opted for the pink shirt/black skirt look from Harry Potter and the Half-Blood Prince. A set of Spectrespecs is a must, and luckily the local Harry Potter merchandise shop could help us out.

What are Spectrespecs?
We are introduced to Luna’s Spectrespecs in Harry Potter and the Half Blood Prince. They were a weird looking set of glasses included in the Quibbler magazine, which Luna was reading on the train ride to Hogwarts. According to the magazine, they make wrackspurts visible to the one wearing them. Wrackspurts are invisible creatures that float through one’s ears causing their brain to go fuzzy (we must have many of those around my place – yet another reason to build these).
Luna, who was now wearing her free Spectrespecs, which gave her the look of a demented, multicoloured owl.
Harry Potter and the Half Blood Prince

Her weird appearance when wearing them in the train compartment, was one of the reasons Romilda Vane told Harry Potter that he ought to ignore his friends and rather come sit in her compartment instead. As we know, Harry refused.
In the movie adaptation of Harry Potter and the Half-Blood Prince, Luna rescues Harry from Draco Malfoy’s compartment on the Hogwarts Express using her Spectrespecs, which allowed her to see wrackspurts around Harry’s head even though he was under his Invisibility cloak. In the book, it was Nymphadora Tonks who found Harry.
Building the Spectrespecs in LEGO
As mentioned, the very first Luna Lovegood minifigure (and the 2018 for the remake in the 2018 Harry Potter Collectable Minifigure Series) came with a head, which dual printing has Luna wearing Spectrespecs on one side. Here is a photo of the two minifigures from one of my first reviews on this page.

We were planning my daughter’s Luna Lovegood dress, just after I had built Hogwarts Icons (see my review of this set here). And looking at the newly acquired Spectrespecs, I thought they would make a good “icon” if only you were able to build them. And while I initially disregarded the idea as impossible, later that evening, working on some other models my eyes fell on a few curved tiles in the new “coral” colour, and I had to try coming up with a workable solution.
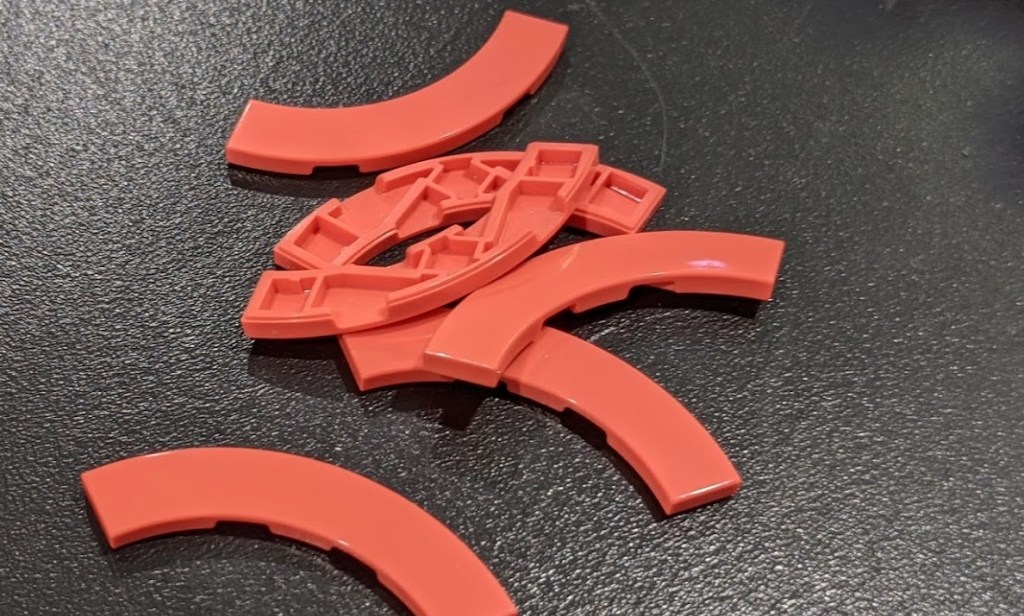
There were a few challenges to overcome. How to hold it all together? How to attach the lenses? And how to attach the fingers protruding from the rims?
In the end I had to use building techniques that LEGO wouldn’t have accepted – and customise a piece (not for the purists, though there is an alternative, which doesn’t include this step).
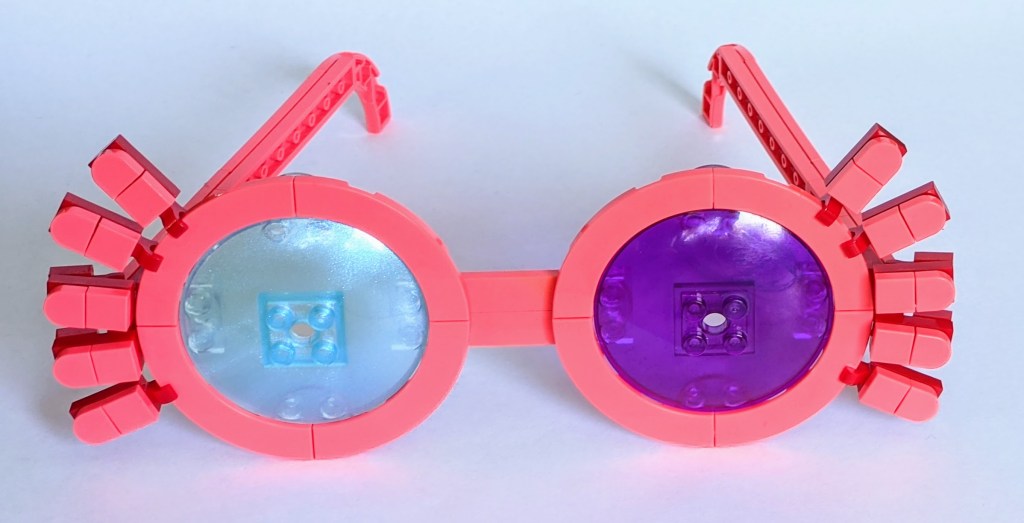
Initially, I opted for the medium azure and purple dishes for the lenses, as they fit within the rims created by the coral curved tiles. Here is one of the final prototypes.
I did minor modifications after this, with this being the final version.
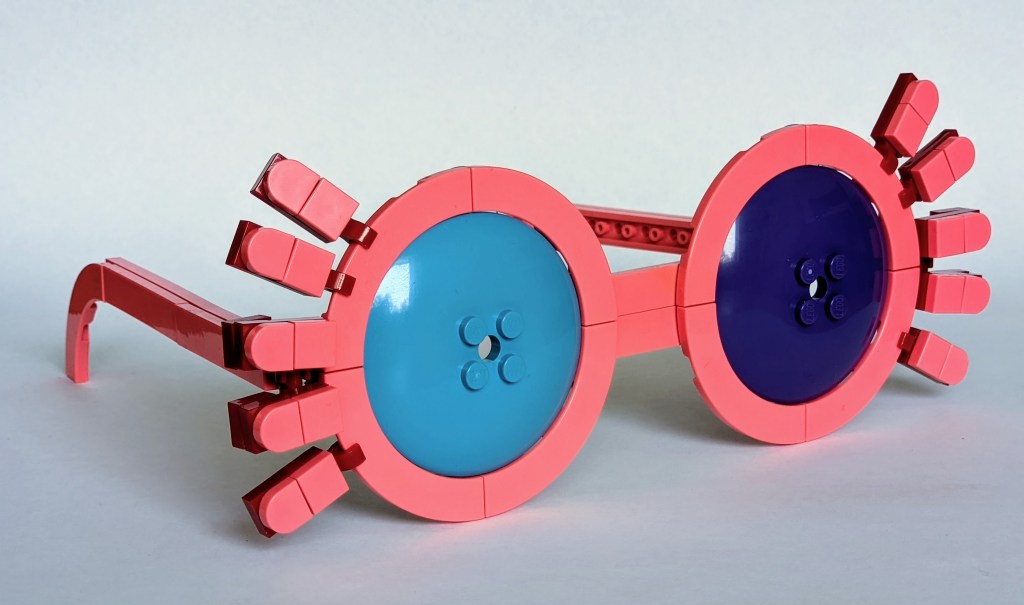
This is done with official LEGO parts only.
Adding transparent lenses
The purists should stick with the 6×6 dishes above. I wanted to use transparent dishes though, but unfortunately, LEGO hasn’t made one in transparent purple, though it was available in light blue satin (it is also available in light blue, but as it has only been released in that colour with an Imperial Star Destroyer if memory serves me right, it is very expensive to source).
In the end, I did something I had never done before. I dyed a brick into the colour I wanted. I had no idea how it would turn out, but I’m pretty happy with the outcome.
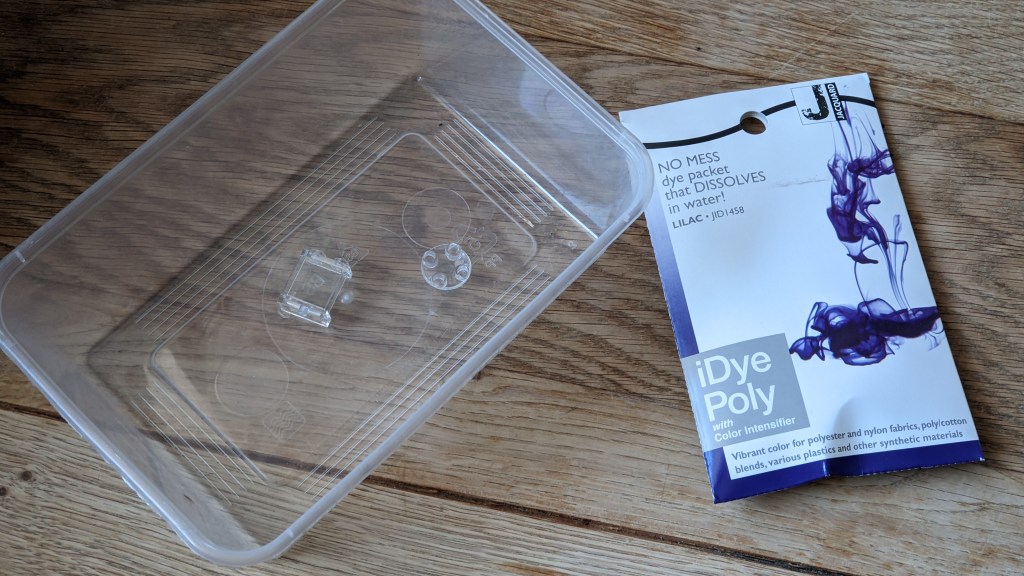
The starting point was a 6×6 trans-clear disc. Initially, I thought of using car window tint (would be hard to apply to this shape of brick though) or maybe some transparent purple paint, though I was concerned that it wouldn’t be even. It was then suggested to me to use Rit dye, which is generally used to dye fabric. Choosing a version meant for synthetic fibres should work on plastic, such as LEGO, too. I found something similar in the local craft shops and could now try it out.
According to the instructions, you should boil the fabric with the dye solution. I was concerned if LEGO pieces would withstand the temperatures from boiling without bending, and did an initial test without the boiling. I created a solution of about half the dye in warm water using a plastic container and put a few test bricks into it. As it was rather smelly, I placed it outside.
After an hour or so, I took them up to see if they had taken any colour. They hadn’t. I checked again the next morning – same outcome. I realised it probably wasn’t going to work, but I did let them stand for a bit more than a week, and in the end I thought the bricks had obtained a purple-ish glare, though when I washed them, they were just as clear as when I started.
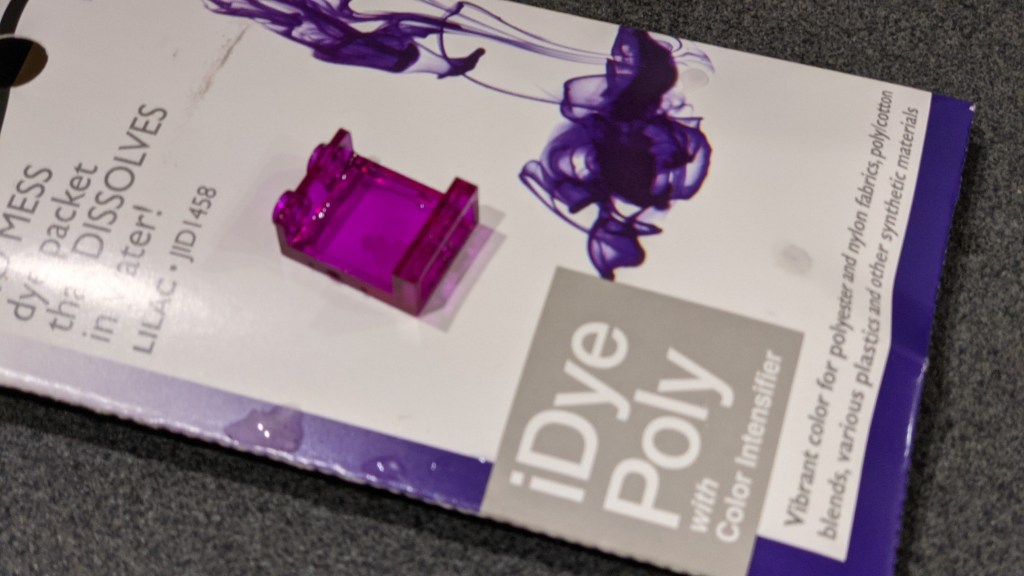
For my second attempt, I decided to boil the bricks with the solution as per the instructions. I tested with an inexpensive brick and it took a lot of colour just from a few minutes.
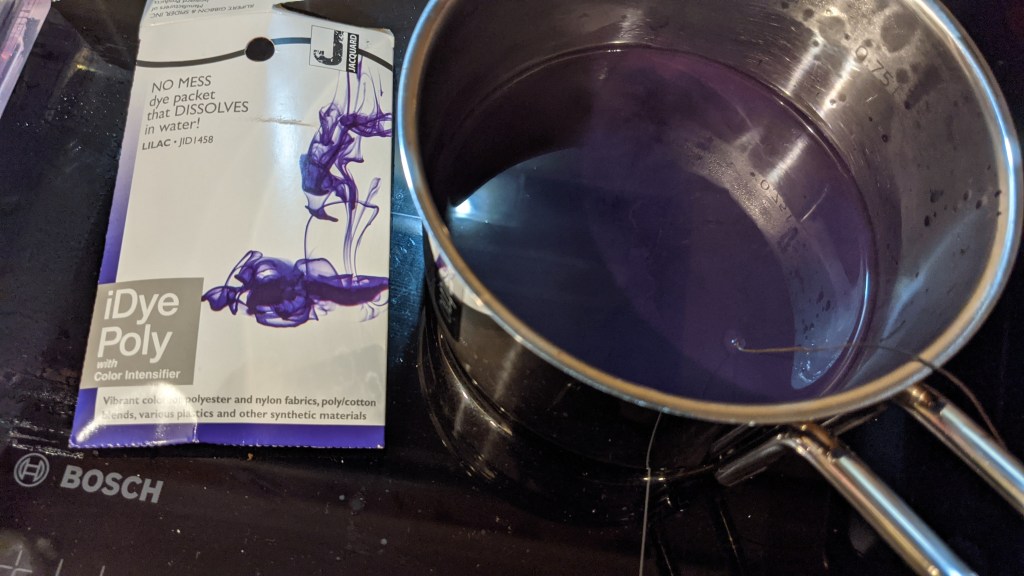
It had a nice even colour and was without any apparent damage. So this seemed to be the way to go.
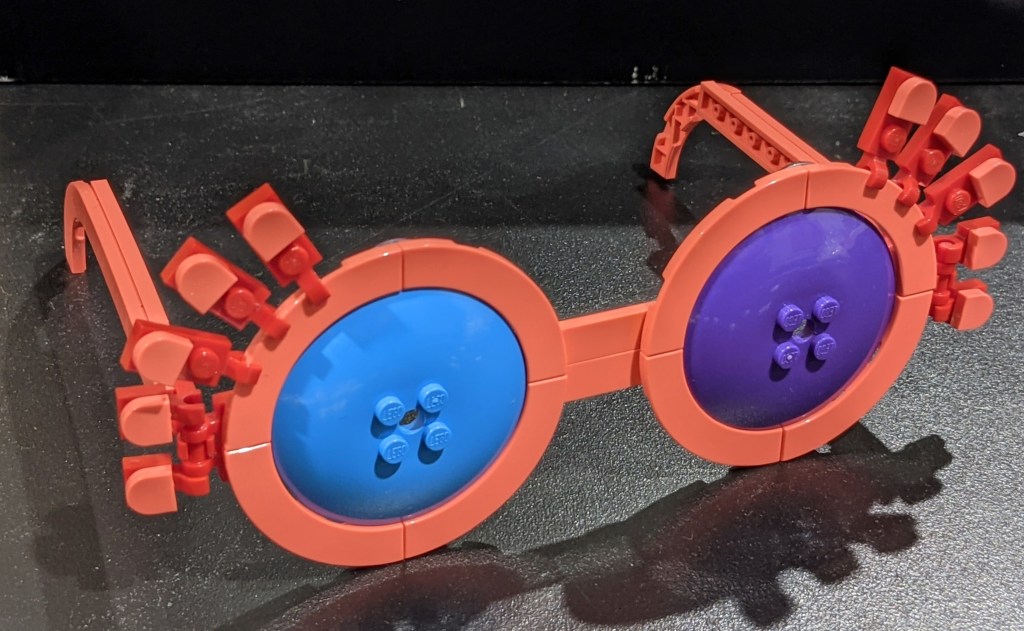
In went my transparent 6×6 dish and soon, actually a lot sooner than expected, it was purple too. As it all went fairly quickly, it did get a darker tint than what I had planned for. The colour was less even too – most likely because of fingerprints on the dish. For anyone going to try this, make sure the bricks are clean when you dye them. From most angles, the dish looks perfect though and I am really happy with how the glasses look with the transparent lenses, as seen below.
They are not super-solid, but are still okay to wear if you move carefully around.
For anyone who may want to build a copy themselves, the key to hold it all together is the round 2×2 transparent plate with rounded bottom (often used under boats to make them slide nicely on a table). The photos below from the back, show it better. (EDIT: Instructions are now available)
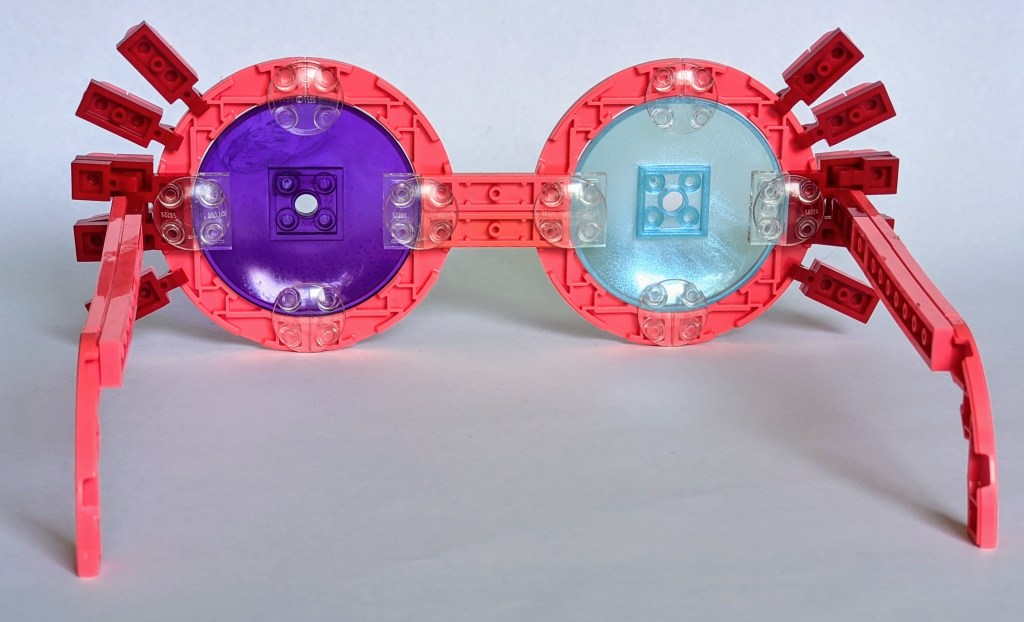
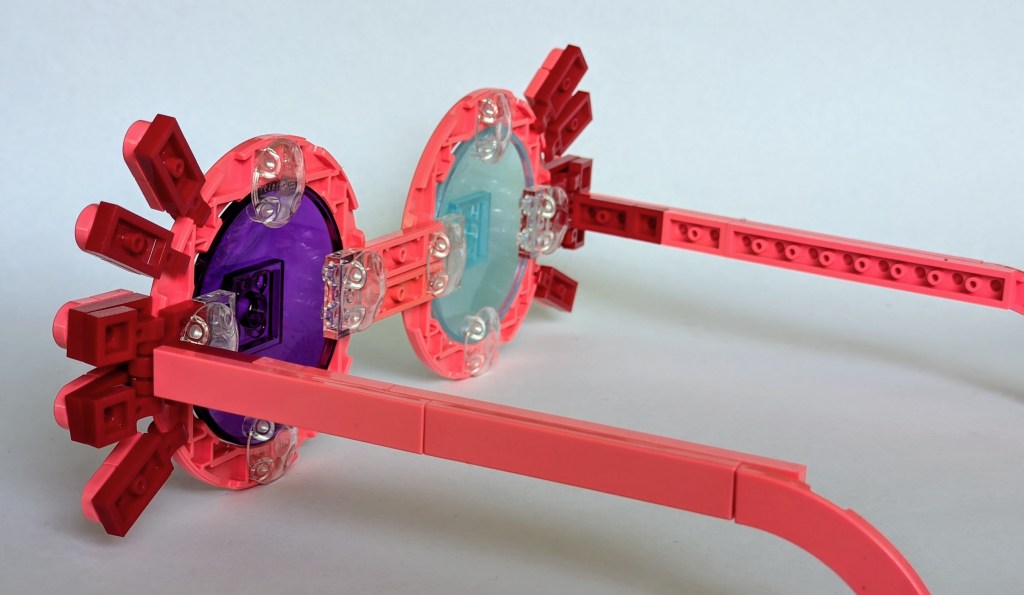
It would be great if the 1×2 plates with clips came in coral too, to avoid the red. From the front, it works well enough with the red though, as mostly hidden from sight.
Conclusion
This is my first addition to the Hogwarts Icons series. I’m keen to hear what you think of the Spectrespecs – is that a worthy icon? Any improvements that can be made to the design? And what other icons do you think should be added to the collection? Please leave me a comment with your suggestions.
Now I’m going back to reviewing the remaining 2021 sets. It will probably be a week or two till I get another post out though.
Till then, Build the Magic!

Your Spectrespecs are gorgeous! Are you able to post instructions? Also other Icons I would love to see are: a Timeturner, a Rememberall, a Prophesy Sphere, and the Deluminator.
LikeLike
Thanks for your great suggestions for other icons. FYI I’ve just posted instructions for the spectrespecs on the blog 🙂
LikeLike
LOVE them!!!!
LikeLike