
Entering two weeks of mandatory hotel quarantine after returning to my home country, I was lucky to have Diagon Alley delivered to keep me occupied. This is an amazing set – one of those where you wish you can continue building forever, discovering cool details and impressive building techniques all the time. Here is part 1 of my review of this LEGO Harry Potter highlight of the year…
The huge Diagon Alley (set 75978) was revealed a few months ago and has been the centre of attention of LEGO Harry Potter fans ever since. It is not surprising, both due to the size and level of detail, but also because of the nature of Diagon Alley.
In the first movie, Harry Potter’s visit to Diagon Alley is when he first truly enters the magical world, and his awe when seeing all the magical shops was one of the key highlights of the movie for me.
Diagon Alley was therefore the theme of three of the smaller sets that came out in 2002 and 2003. Later on, the fantastic 2011 Diagon Alley (set 10217) gave us some much improved buildings, but we were still missing some of the most important ones. And as we shall see, 75978 is a worthy successor of the 2011 set.
Being a huge fan of the 10217 Diagon Alley set, I have in the last year been building my own large model of the wizarding world shopping strip, only to learn about this set a few months ago. It has been amazing to design and build my own model, and while it isn’t completed yet, I am still planning to finish it, as it is somewhat different from the new set. My version, for instance, is mainly based on the buildings used in the later Harry Potter movies, where the new 75978 set focused primarily on the early movies look (as I discussed in my interview with the lead designer Marcos Bessa).
For completeness, it should be acknowledged that LEGO has made published micro-scale version of Diagon Alley (set 40289) in 2018 as well, which was only available as Gift With Purchase (GWP) that year and was not sold by retailers.
Box and content
The box is huge, and with 5544 pieces it is also the second largest LEGO Harry Potter set ever released, only being exceeded in piece count by the 6020 piece Hogwarts Castle (set 71043) from 2018.
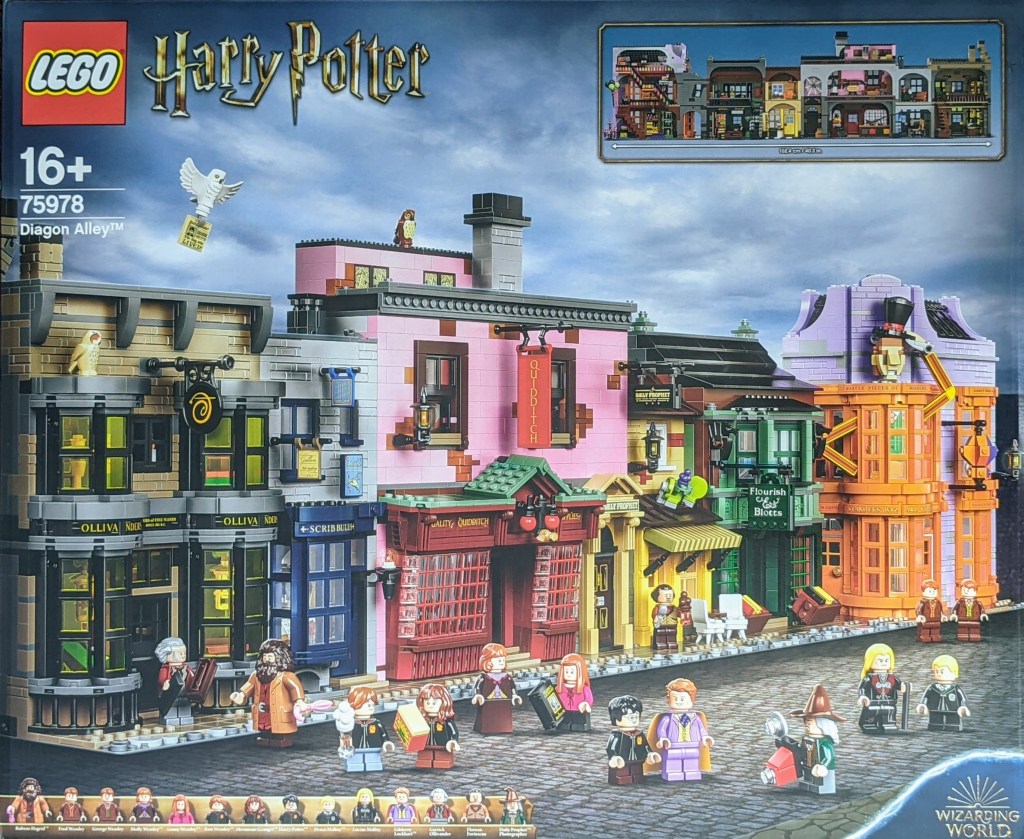
The front of the box shows the completed set with the Diagon Alley buildings all lined up in a row. To better fill the front of the box, it is shown slightly from the side, which works quite well giving some depth to the photo. In the top right corner, an inserted photo shows the back of the model and highlights the entire setup is more than a meter long (40 inches)! The lower left shows, as usual on Harry Potter sets, the various minifigures included in the set. I will cover the figures in Part 4 of this review.
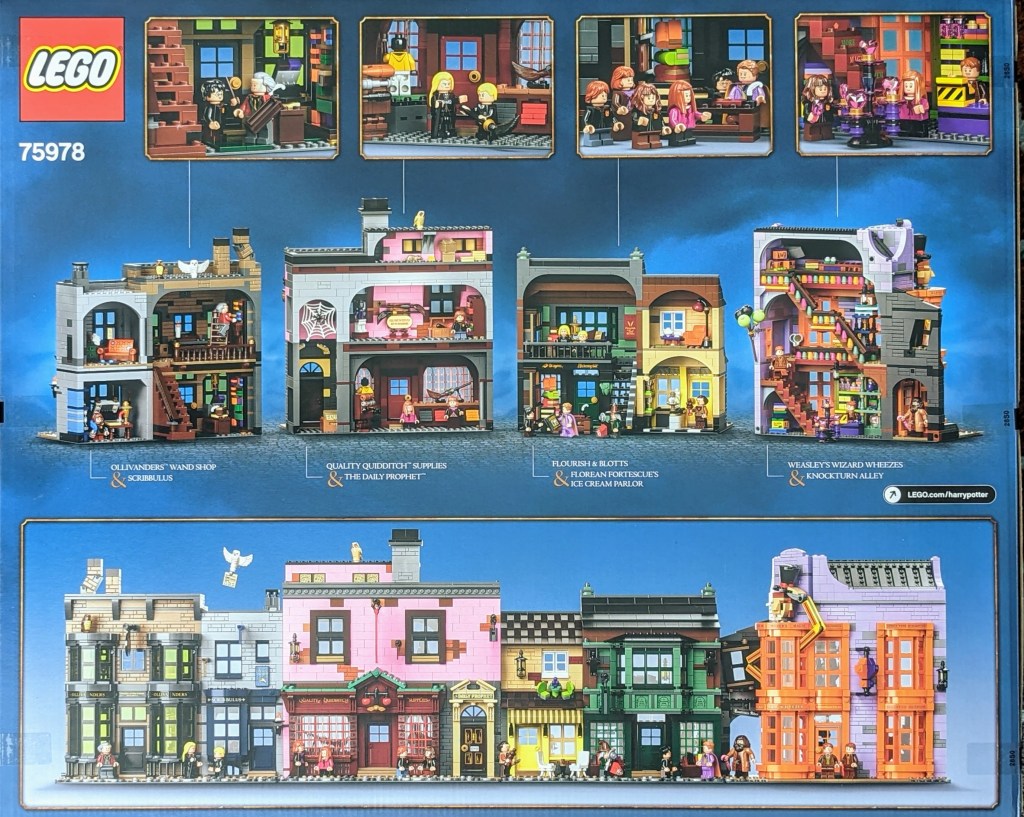
The back of the box shows the back of the buildings in more detail. Here you really get to see the level of detail to expect (the small insert on the front page doesn’t really do it justice). It is highlighted that the buildings can be separated into four sections, and for each, the names of the buildings included is listed (not all may know the Diagon Alley shops’ names by heart). Above this, four smaller photos shows examples of the details within the buildings, with focus on the minifigures populating the buildings. At the bottom is a photo of the front of the buildings. Many will display this model like that on a bookshelf.
Finally, the top of the box again lists all the minifigures (but unlike the front, this is in 1:1 scale) and also shows a few more close up photos of scenes with the minifigures from both from inside and outside the shops.

Opening the box, about half the content is packed in a separate cardboard box inside probably to keep the box more stable under the weight of the content.
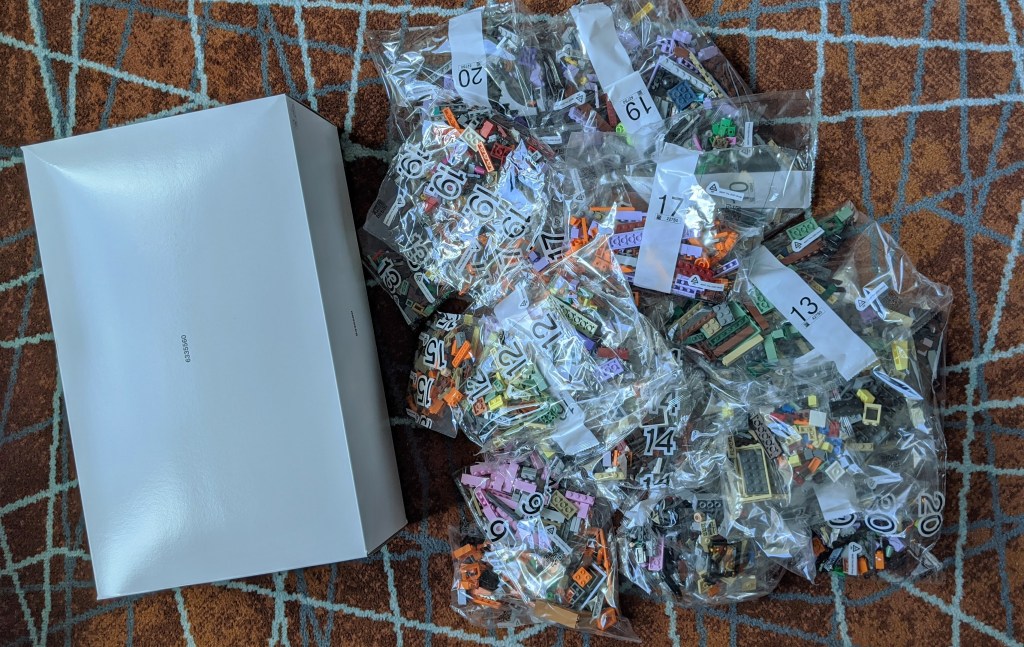
Emptying it all, you will find 41 numbered bags (with numbers 1-20) and one unnumbered bag, mainly with larger plates. You also get four 16×32 baseplates, along with four instruction manuals and sticker sheets, basically one for each submodel built on the baseplates. The manuals and stickers are packed together in a plastic bag, making sure the sticker sheets are not creased.
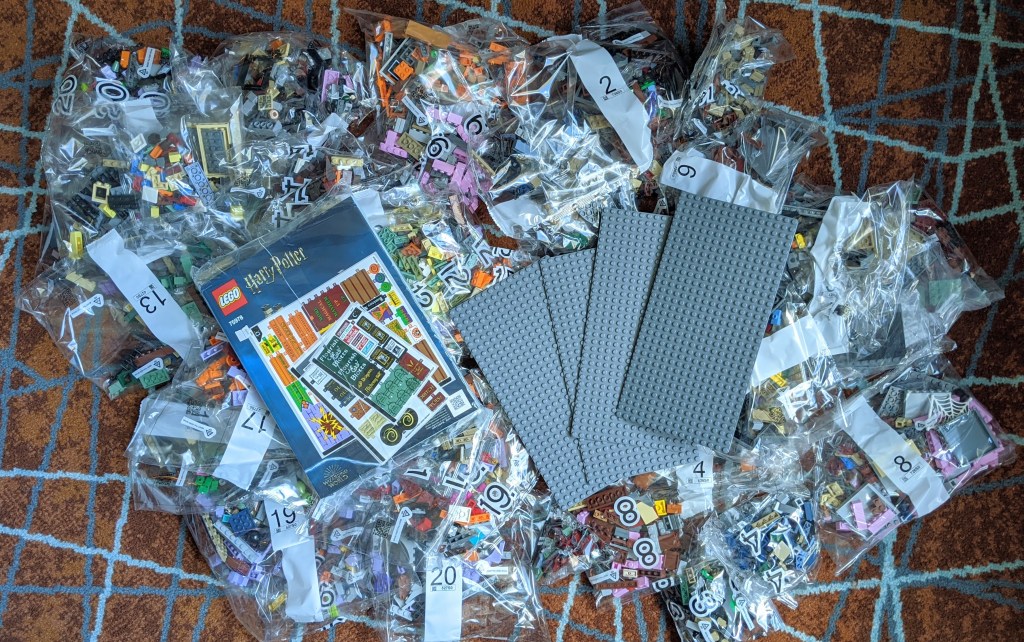
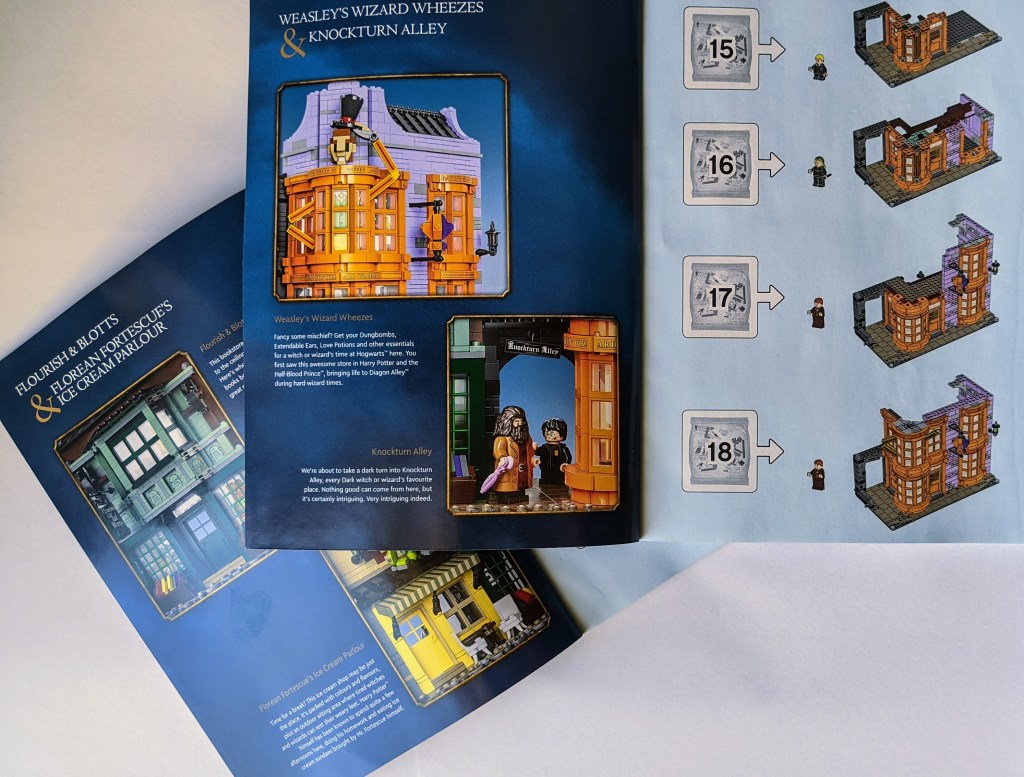
The instruction manuals are of high quality with one for each of the four submodels.
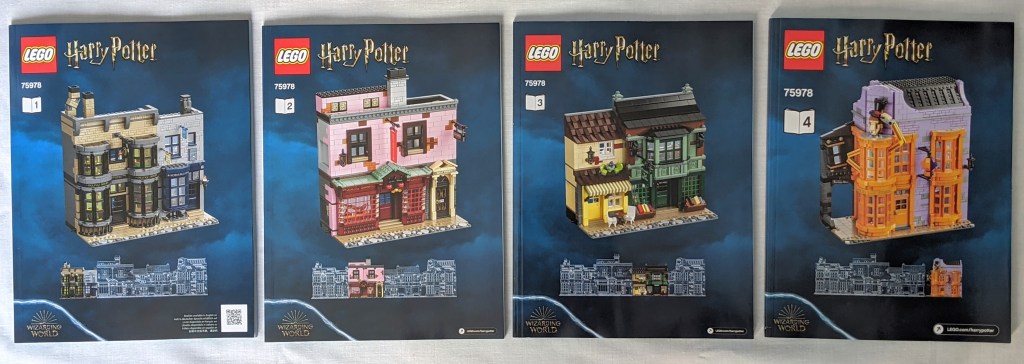
For such a high end, exclusive set, I had hoped for more background information, but it is limited to one page at the start of each manual briefly describing the buildings (what’s being sold in these shops, etc) and four additional pages at the end of the fourth manual with information about the design process, though there is only about half a page of text there. One thing that could have been really interesting to see, would be some of the photos the designers had access to when designing the buildings from the original set, as most buildings are not shown in detail in the movie.
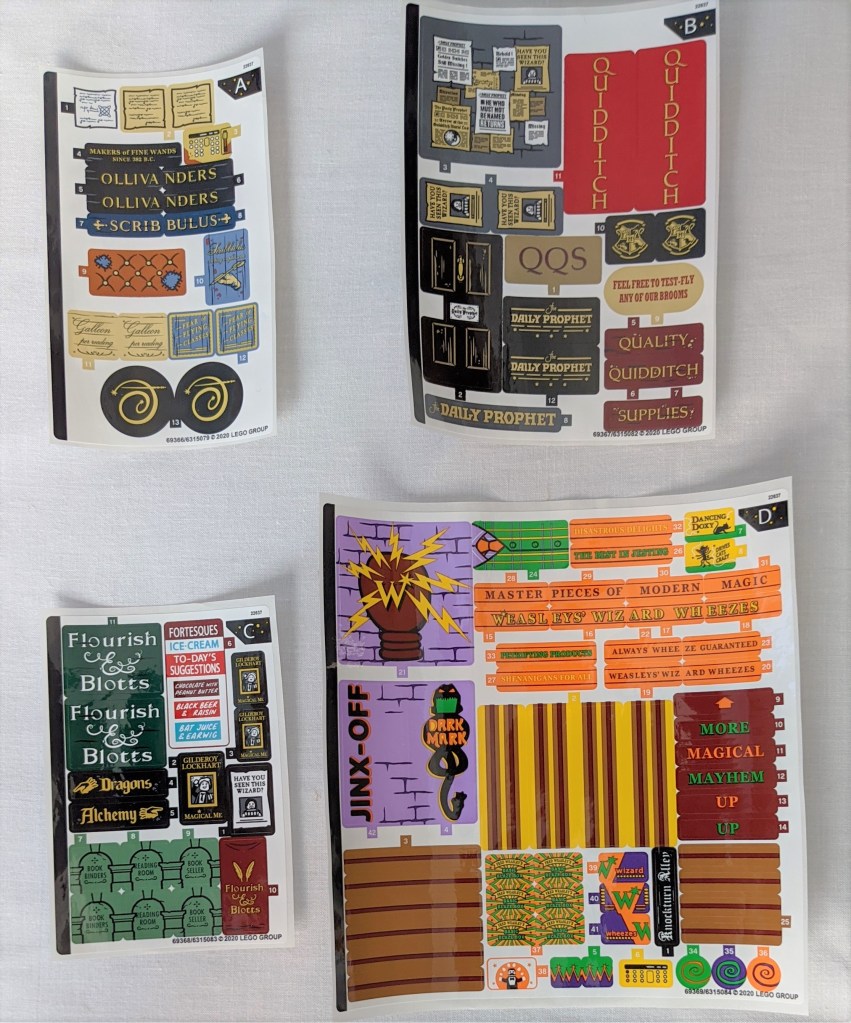
As said, there are four sticker sheets – one for each set of buildings. Generally, they look great, but I do have a feeling that you could have got a just as awesome looking set with half the stickers (or even better printed bricks), in particular for the Weasley’s Wizard Wheezes shop.
The build
The first submodel covers Ollivanders wand shop and the Scribbulus wizarding stationary shop and is built from the pieces in bags numbered 1-5.
Bags numbered 1
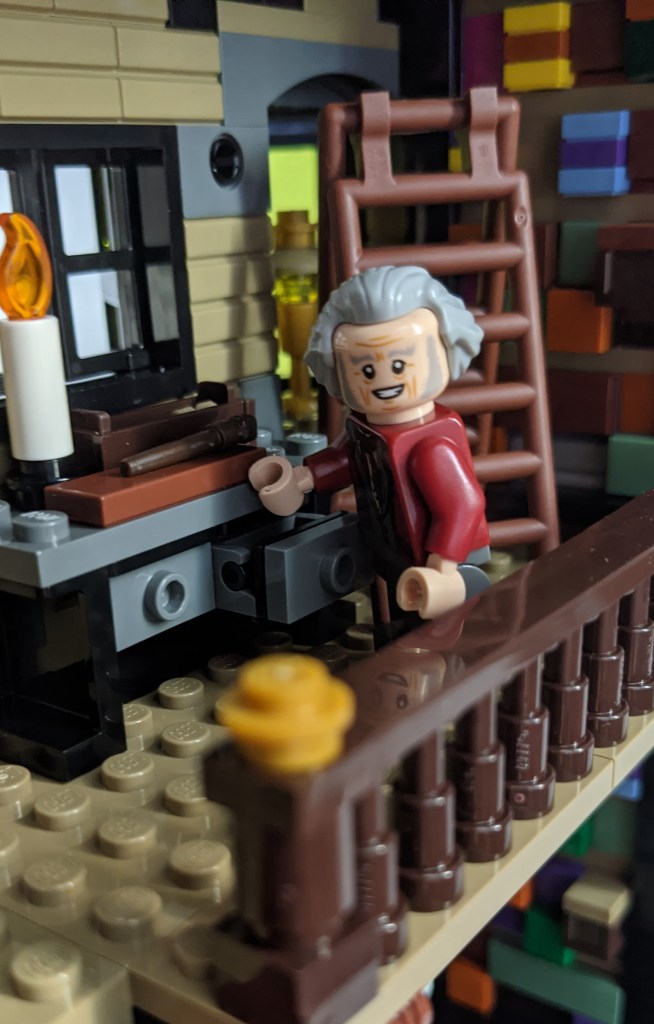
With a bit of help from Fred (or George – maybe Molly can tell, I cant) from the Harry Potter CMF series 2, I got started on the first bags.
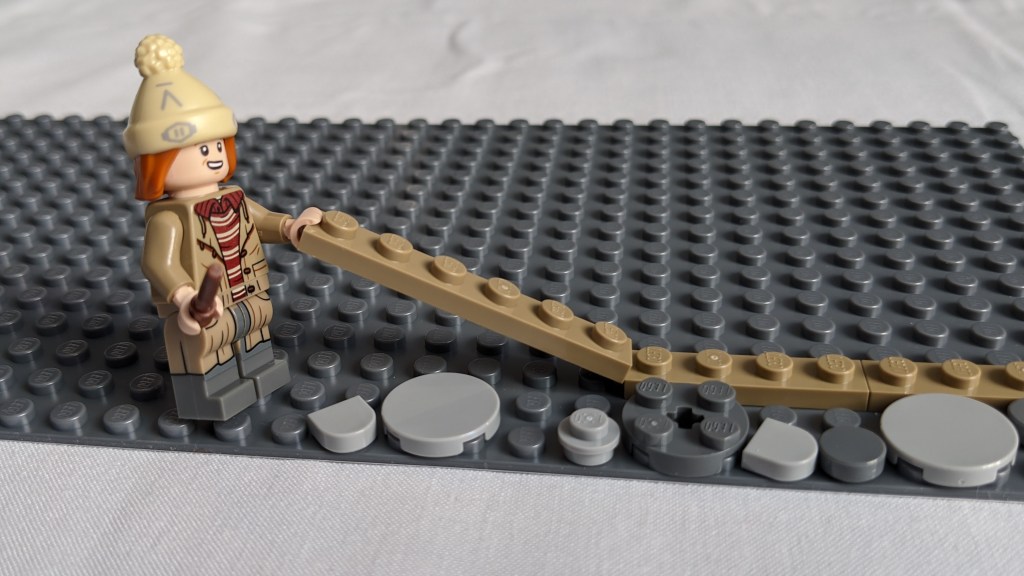
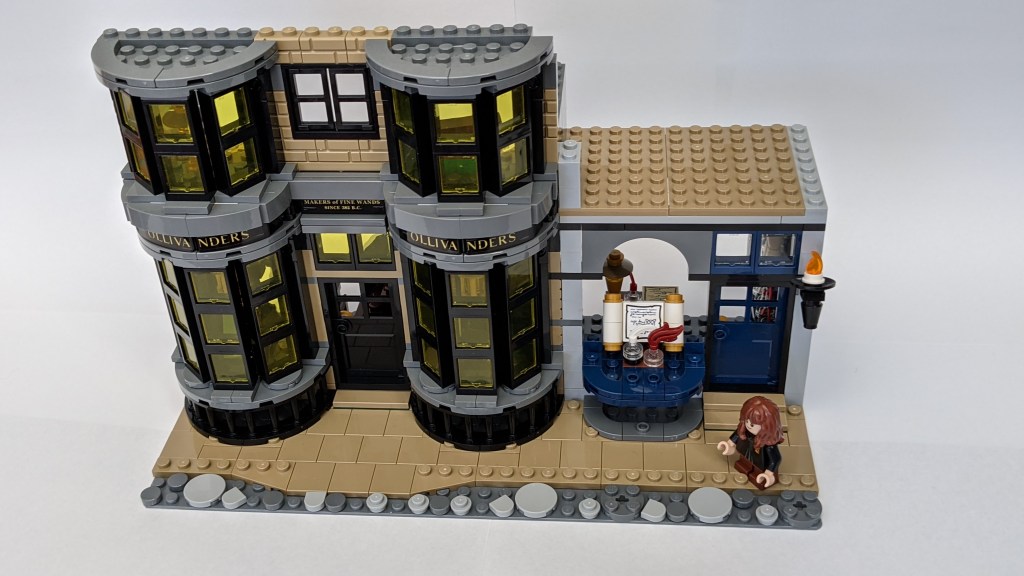
The build progressed reasonably fast, even though there is a lot of bricks used to achieve the level of detail you’d expect from such an exclusive set. It is a fun build too, with a good mix of stacking bricks for walls interrupted regularly by having to add details for the bay windows or interior. When finished with the first lot of bags, the model looks like as per below.
Here are a few photos showing some of the details in the build after the first set of bags.


Bags numbered 2
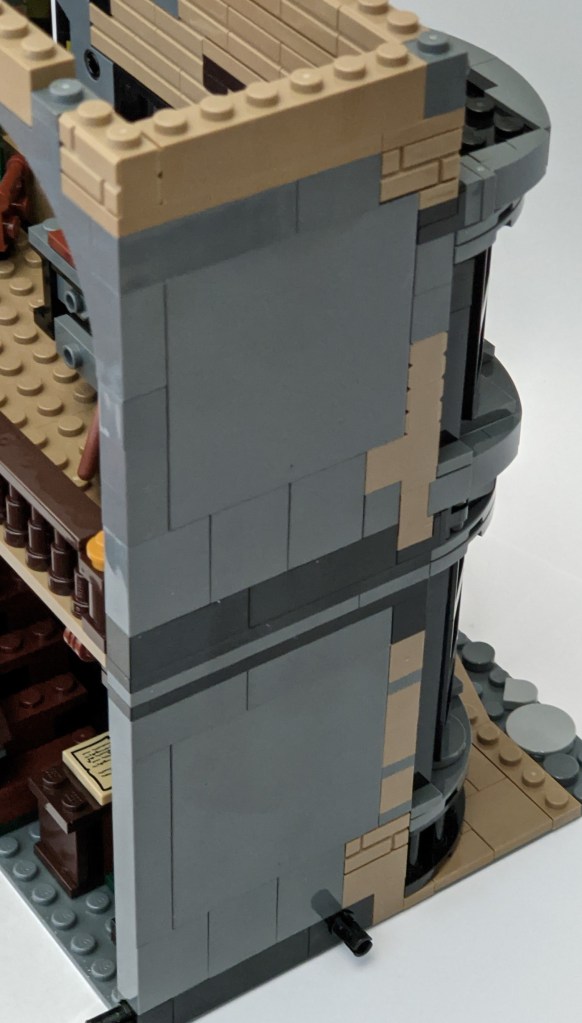
The second lot of bags focused on progressing Ollivanders, and in particular adding detail to the inside. Here are overview photos of the front and back once completed with the bags. The stair at the back clewerly swings to the side so it takes less space (if displayed against a wall).
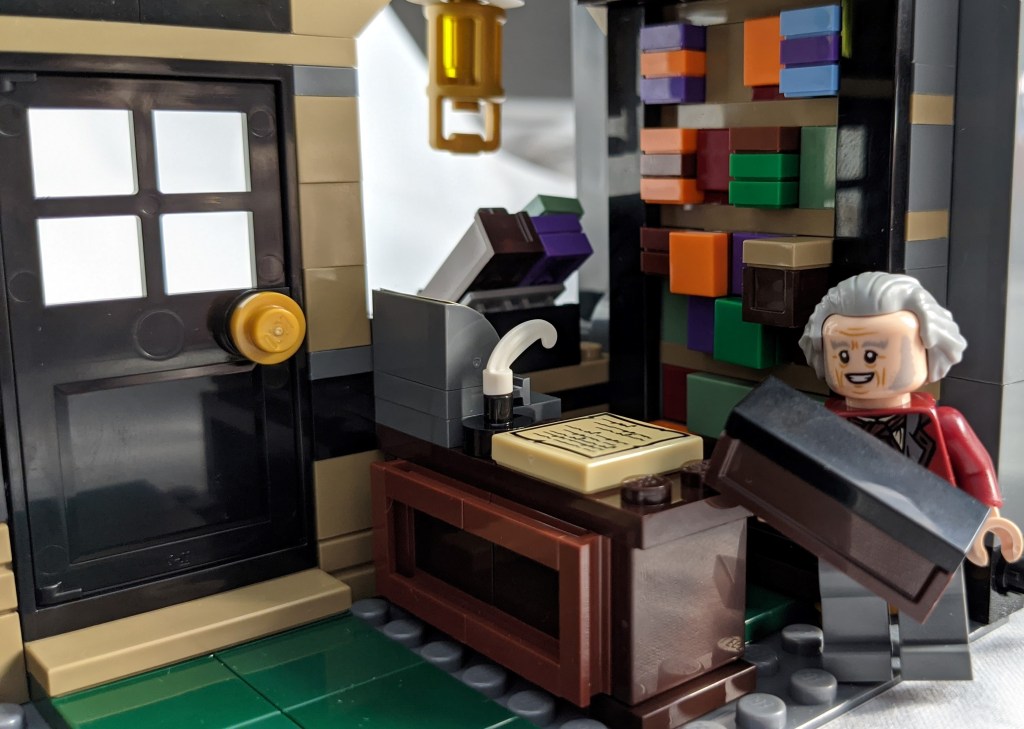
Below I have added a couple of photos of the details inside the building. I really, really love the shelves full of boxes with wands – as well as the new wand box Ollivanders are holding below (which I’ll discuss later in more detail). The details on the desk (right photo) is also amazing. Building this lot of bags was a fantastic LEGO experience.

Bags numbered 3
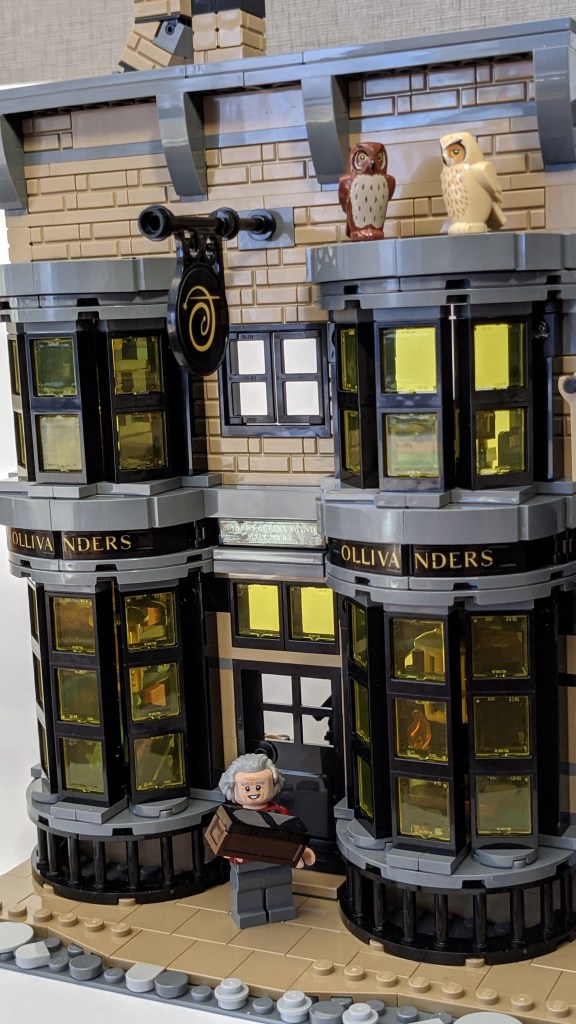
Moving on with the third lot of bags, most of the front of Ollivanders is now complete – with the curved bay windows looking absolutely stunning. I like the use of the trans-yellow windows, but it is a shame the centre window above the door doesn’t have coloured glass as well.
I missed the detailed interior models from the last lot of bags, but they will come later I know. Here is the front of the buildings after completing this set of bags.
As stated, there is not a lot of details inside on the top floor at this point apart from a few things in the window sills.
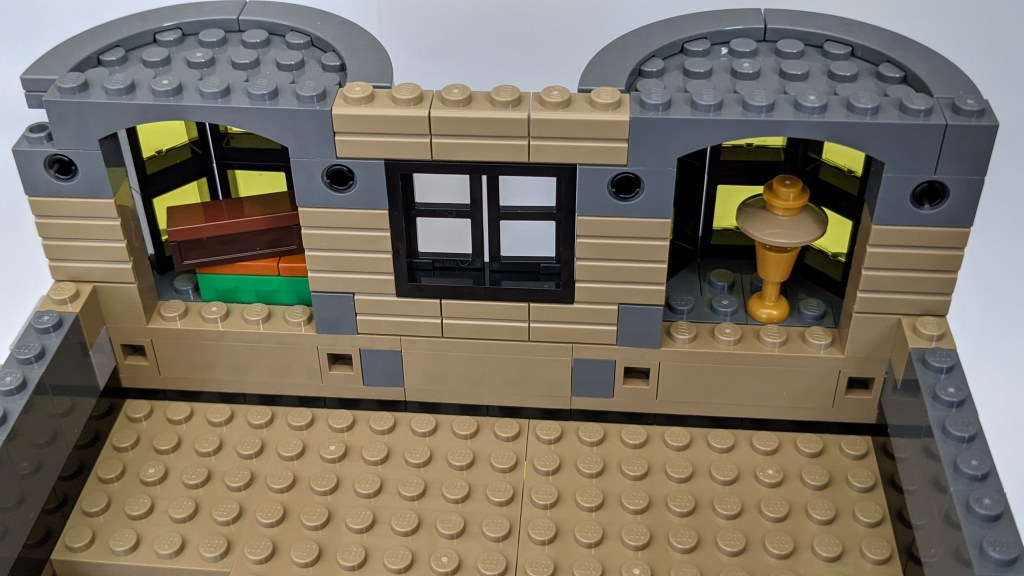
So let us hurry on to the next bags.
Bags numbered 4
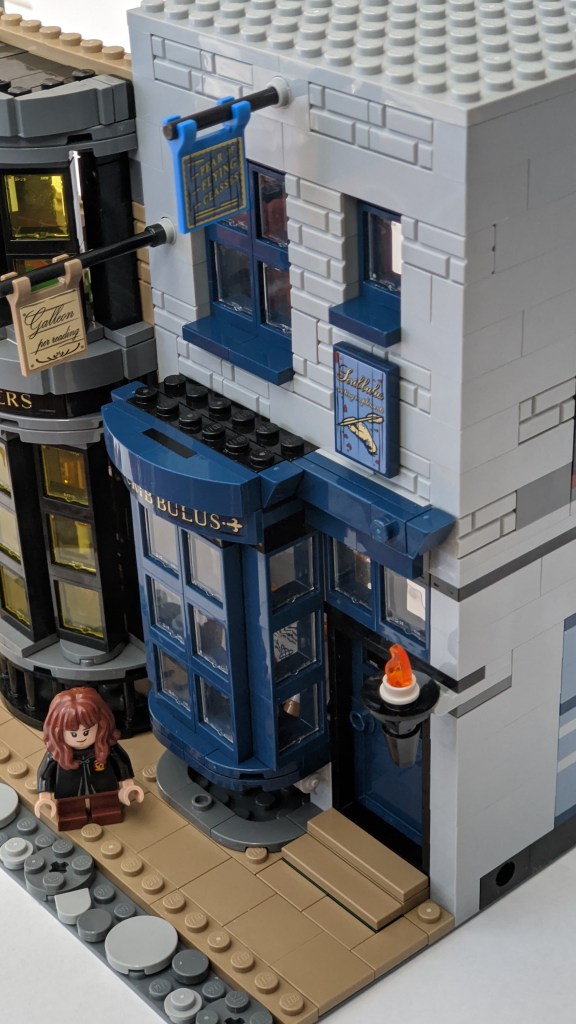
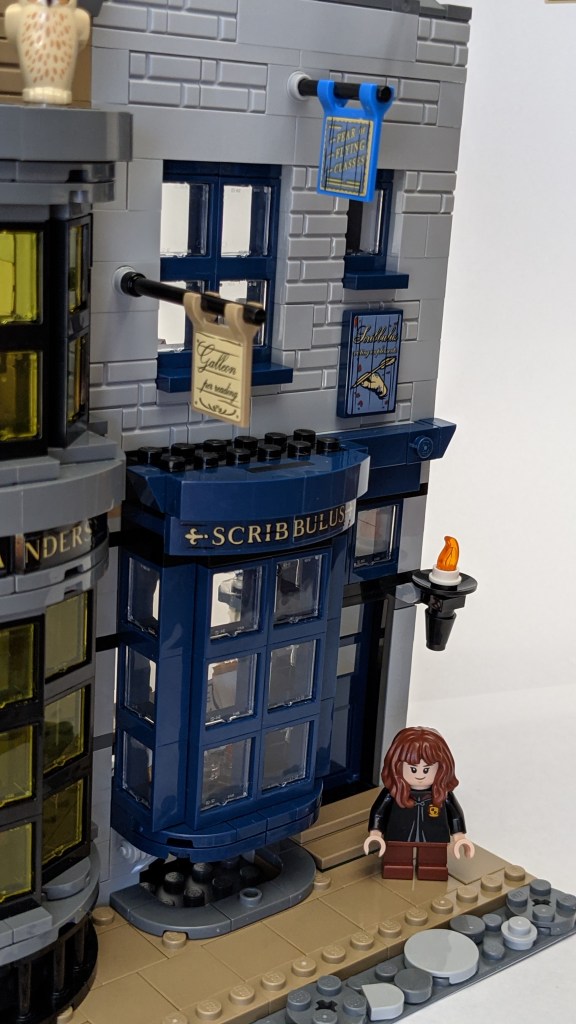
The fourth lot of bags allows us to almost complete the Scribbulus shop (just missing the details on the roof). I really like the flags/banners hanging at irregular locations on the front, though the facade is otherwise rather plain towards the top.
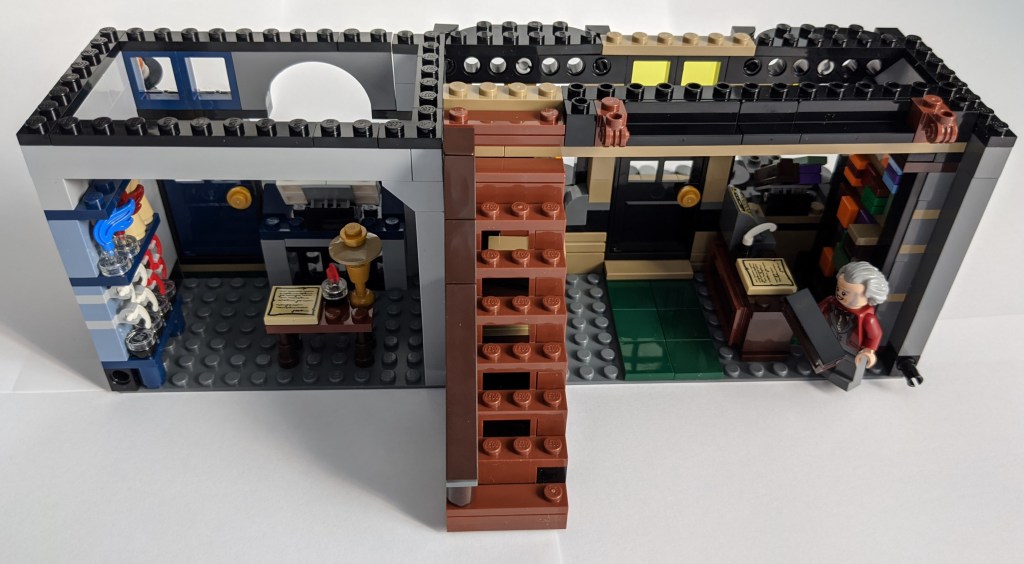
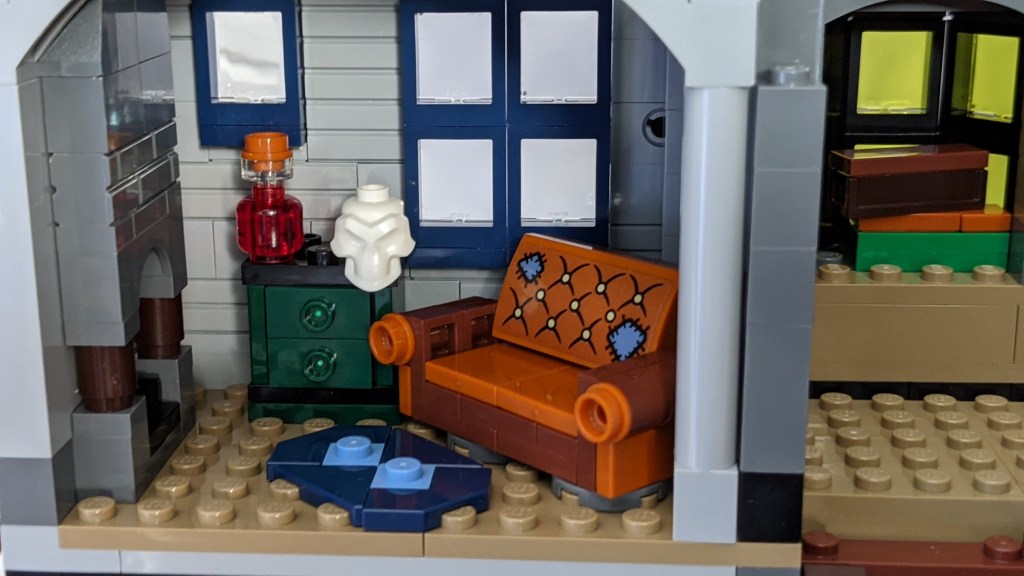
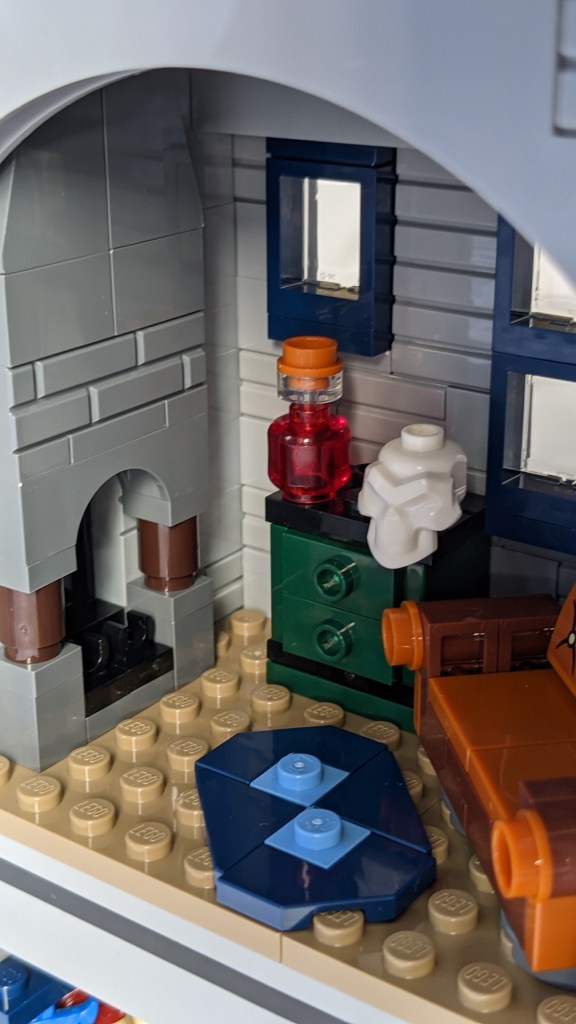
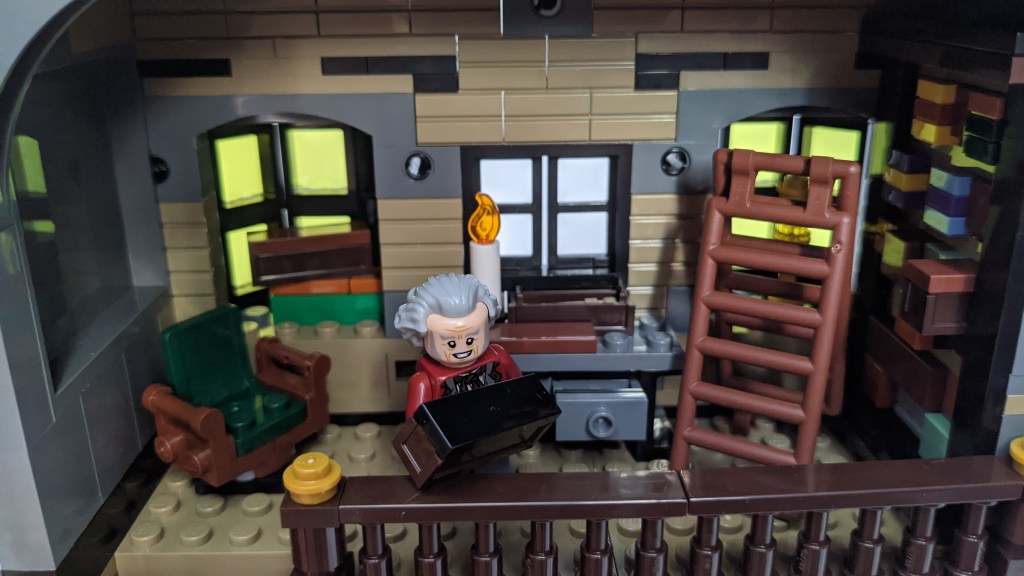
The back is more interesting, with a rather detailed wizard living room above the Scribbulus shop having now being added.
The photos below try to capture some of the details. The only complaint I have is the fireplace. It has clip holders on the floor. Why no flame pieces to put in them? They may not be in production this year? Otherwise, this is a bit odd, but I have plenty of spare flames at home I can add myself. Apart from this, the furniture and carpet is pretty amazing.
Bags 5
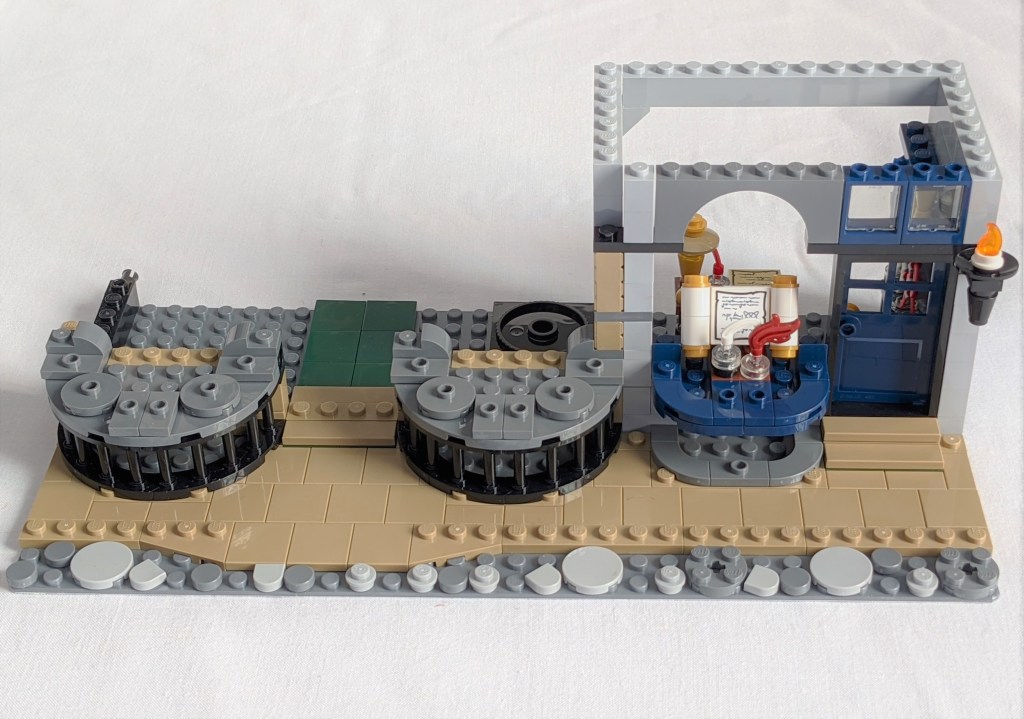
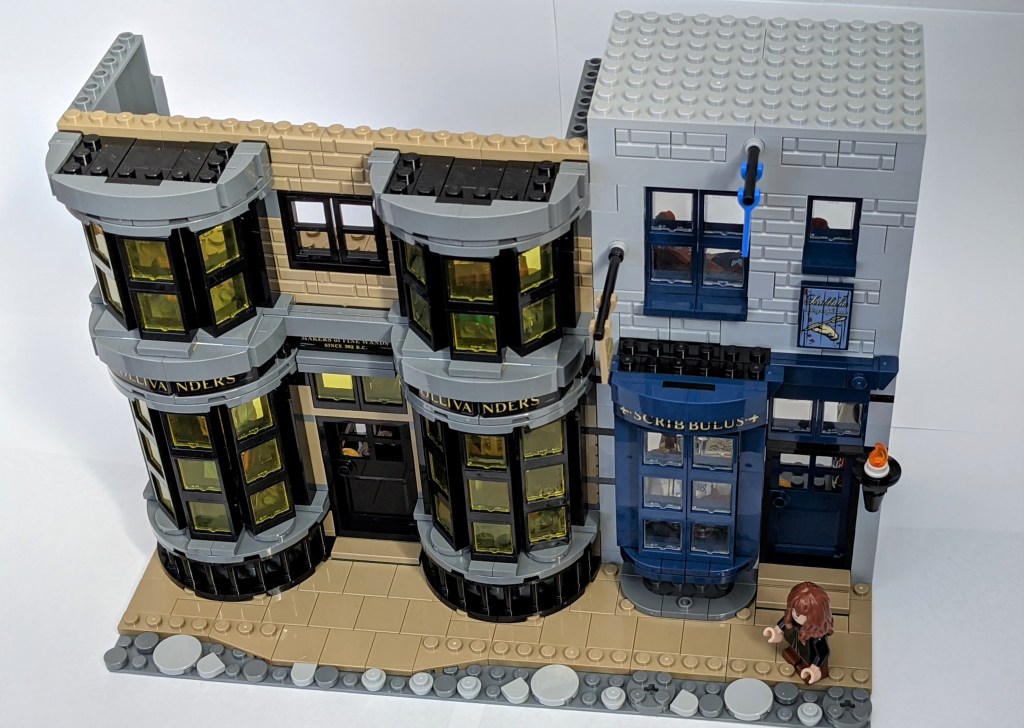
The fifth set of bags completes the first submodel. The two buildings look great and complement each other well, with the warmer dark tan coloured building to the left and the cooler grey building on the right. Having the buildings all appear different really enhances to overall look of the entire model when all four submodels have been completed.
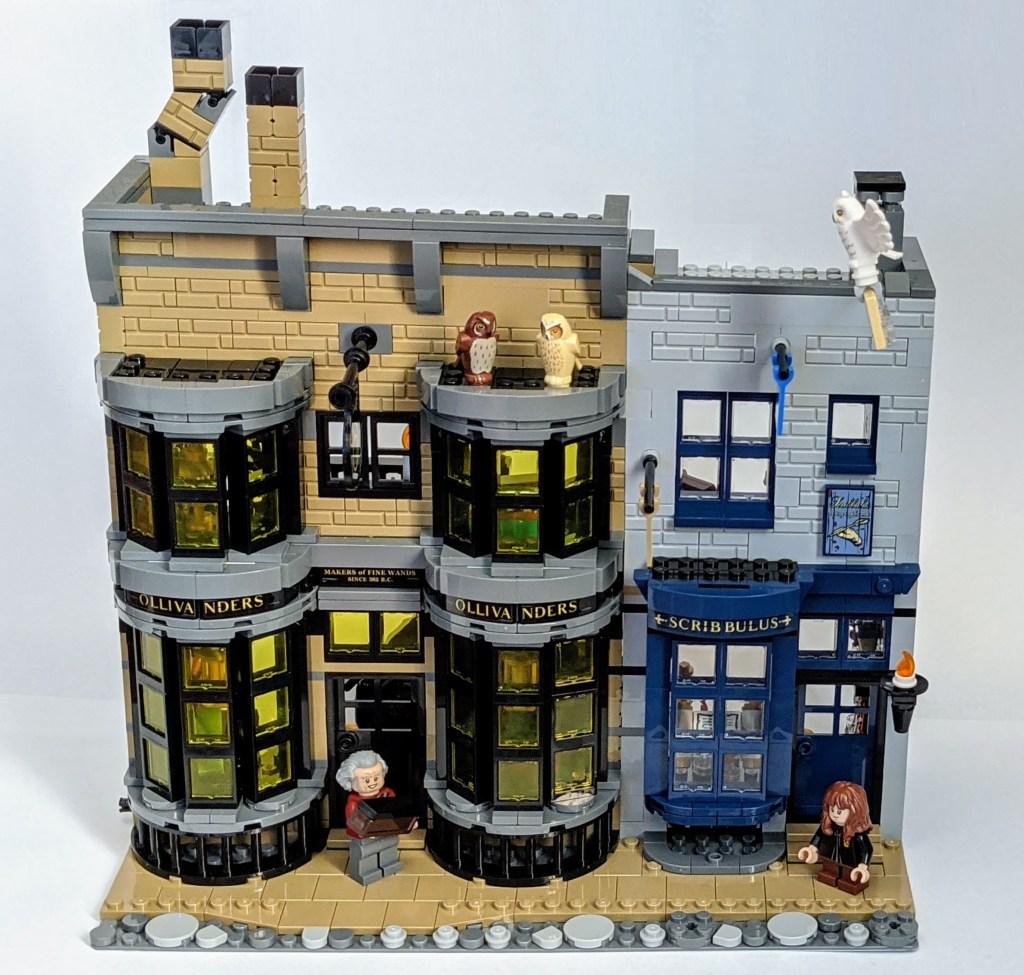
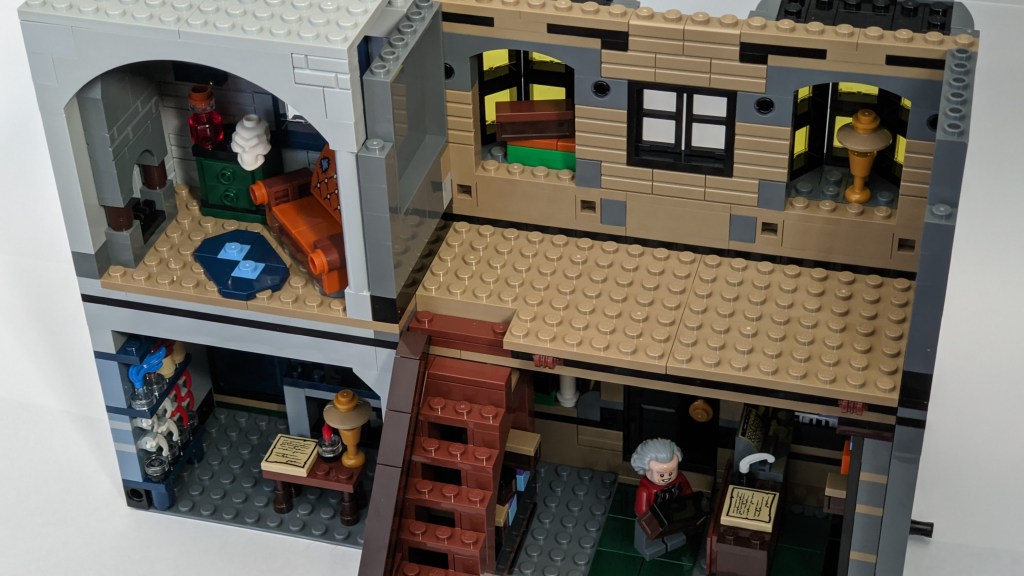
The top floor of Ollivanders is now fully furnished, with a chair, a desk with open drawer and another shelf full of boxes with wands.
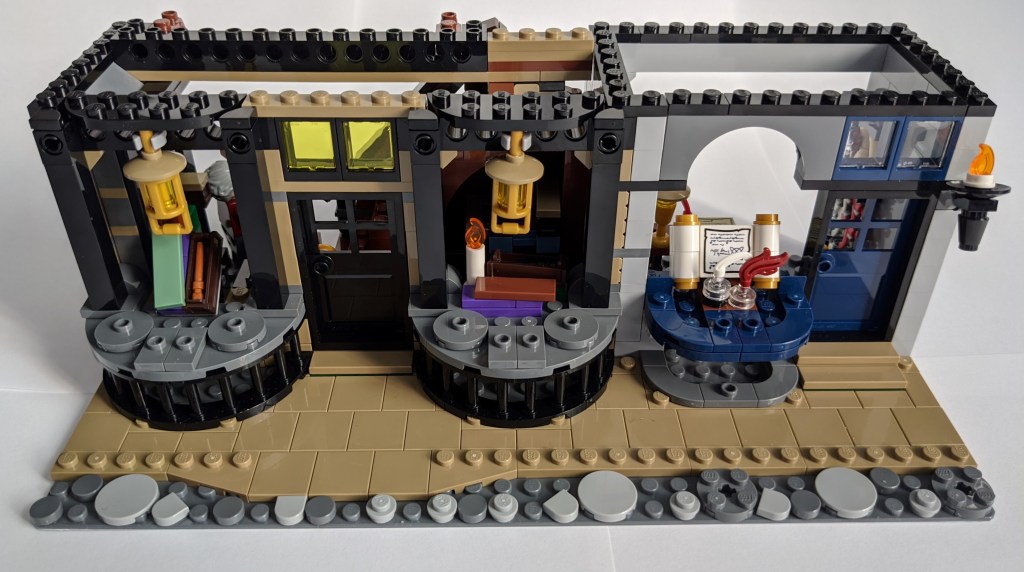
The two building fronts look great with the roofs completed and banners and signs added.
The interior looks absolutely amazing too, though the use of the big grey panel for the wall (right photo) annoys me, as I’ll discuss further below.


Key observations
In the following I will cover a few observations from building the first submodel.
Figures
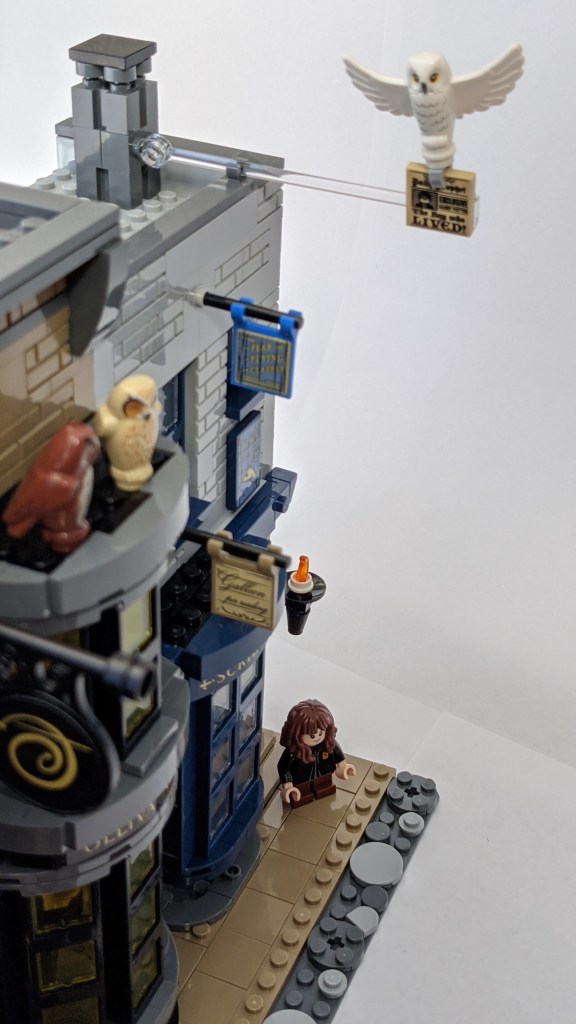
In the build covered above, there were two minifigures included. I haven’t discussed them here – but will do so in the forth part of this review series, when I have all 14 figures to discuss. As part of this submodel, we did however get three owls, including the one of the new ones of Hedwig with spread out wings.

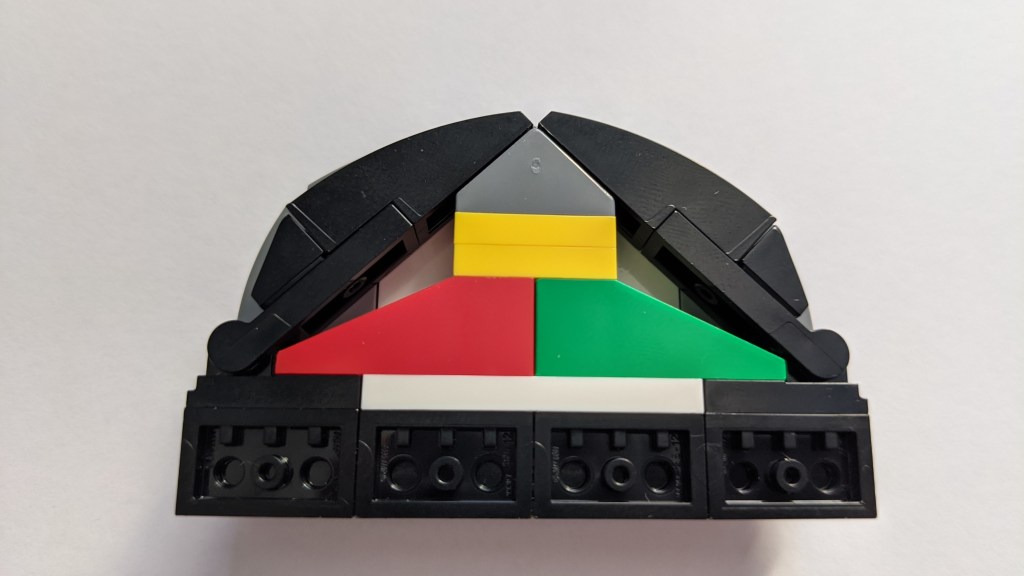
A homage to Portugal
The lead designer of the set, Marcos Bessa, is from Portugal, and he often hides the colours of the Portuguese flag within the models he designs. He has done so in this model too, within the construction of the curved windows at Ollivanders in the third lot of bags. It is nice to find such small Easter eggs within the models.
Use of large wall panels
Generally I oppose the use of large panels (such as the 1x6x5 panels) in exclusive models, as they often detracts from the aesthetics. Unfortunately, Diagon Alley include quite a few such panels, though the use in some cases is justified, allowing the shelves with wands to extend into the hollow side. Without the use of the panel, the effect of boxes extending out half a brick could not have been done.
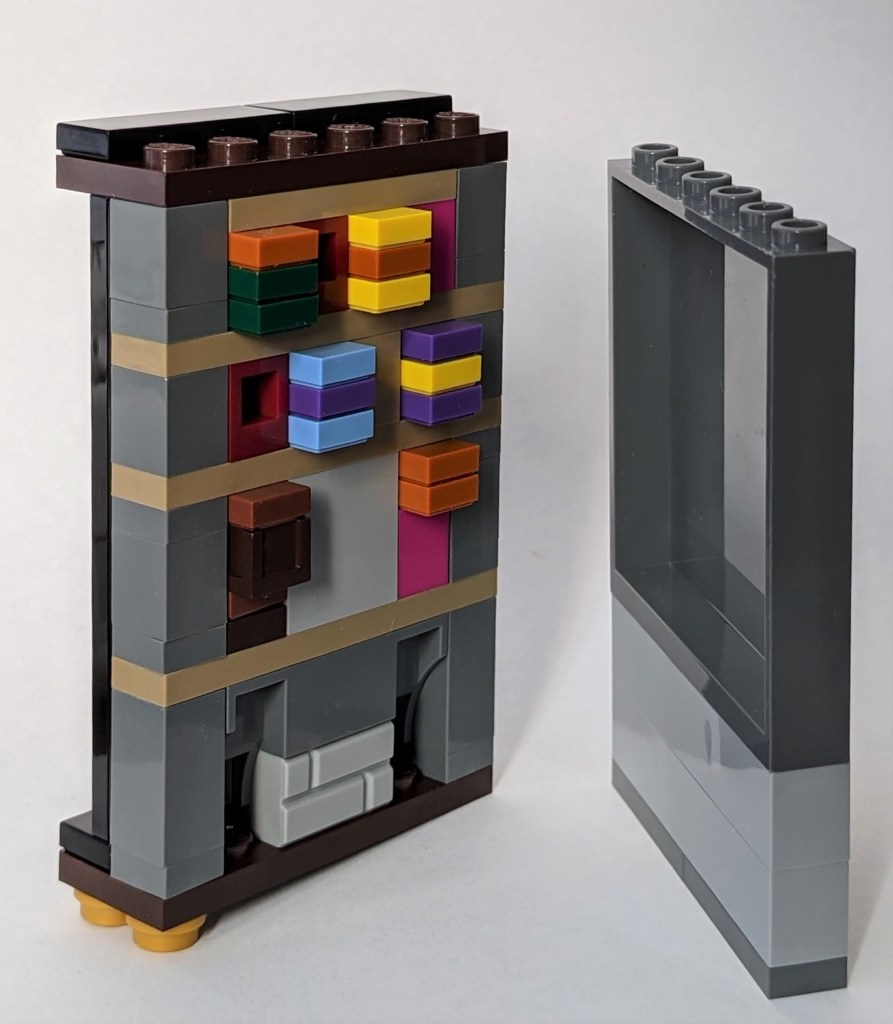
Unfortunately, there are other places in this set where such panels are used (I’ve shown an example further up), where there is no particular need for it other than cutting costs. A brick built wall would have looked a lot better.
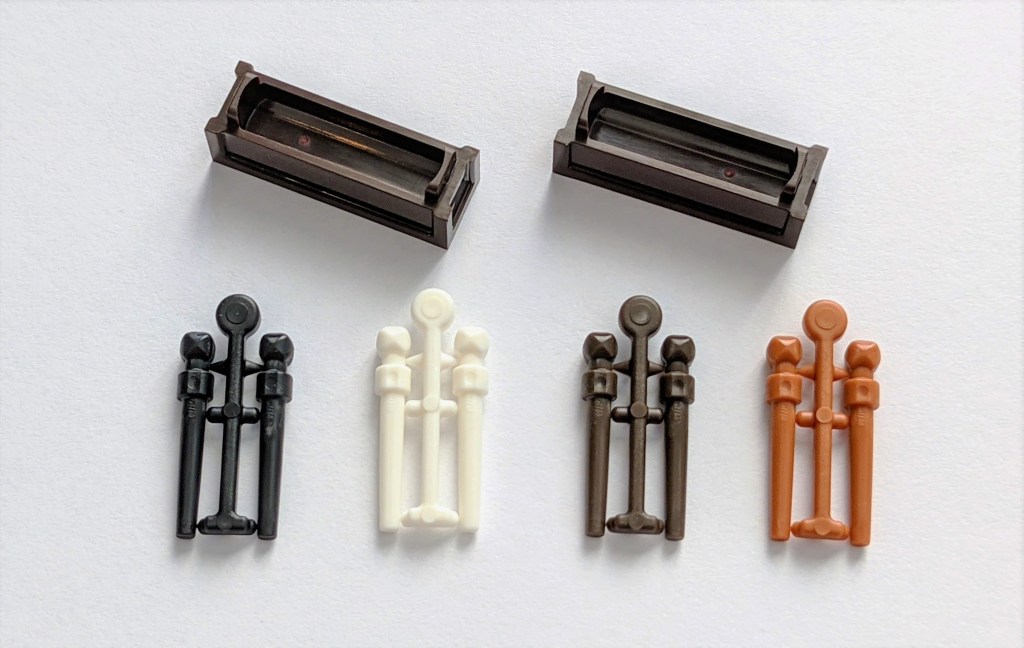
The new wand box
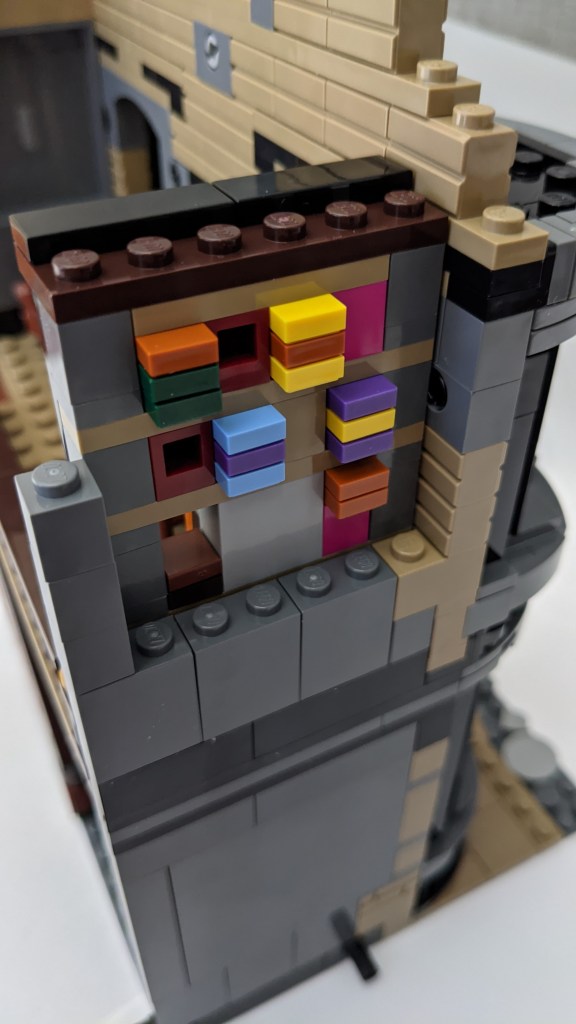
There are a few new parts in the set, but the most interesting one is the new wand box. The set includes 10 of them, all in dark brown. There are plenty of wands too.
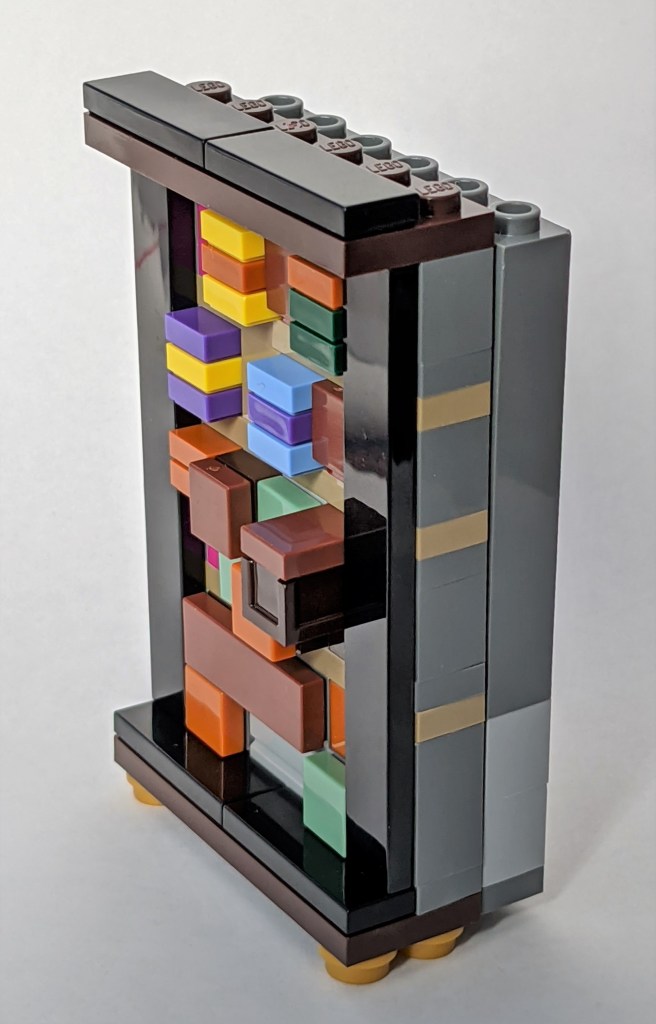
The 1×3 sized box allows a tile to be fixed on top as a lit. But it also allows other pieces to be put on top, for example stacking wand boxes, as I have done below creating an interesting looking profiled wall. I’m sure there are many other alternative uses of this interesting new piece and I am looking forward to see what AFOLs around the world come up with.

Conclusions
With this, I will round off part 1 of my Diagon Alley review. I’m busy building the second part, so it will be posted in the next few days.
Note that the set was provided free of charge to Blockwarts for review by LEGO’s AFOL Engagement team. The views expressed in this review are those of the author though.
Having read all the positive feedback about the set, I had my expectations set pretty high, but I must say they have been fully met. The design is cool, the level of detail is incredible and the set is full of clever building techniques. On the downside, I’ve mentioned the many stickers, which could probably have been cut down a bit, and the use of panels in places where it is not required, and partly detracts from the exclusive feel of the model.
But the negatives are small compared to the positives. I’m so much looking forward to continue with the next sections!
Are you planning to buy it? Consider using these affiliate links to LEGO’s Shop@Home and help support Blockwarts that way.
Check our Reviews page soon for part 2.
Till then, Build the Magic!

10 thoughts on “REVIEW: Diagon Alley – part 1 (Ollivanders and Scribbulus)”