
Here is part four of my review of the new LEGO Harry Potter Diagon Alley set. This concludes my review of what I think is an amazing set. Is it something for you? There are a few issues to keep in mind if you have yet to decide whether to buy or not…
This is the fourth and last part of my review of Diagon Alley. The other parts are available on the Reviews page and listed below:
- Part 1 – Ollivanders and Scibbulus
- Part 2 – Quality Quidditch Supplies and Daily Prophet
- Part 3 – Flourish & Blotts and Florean Fortescue’s Ice Cream Parlour
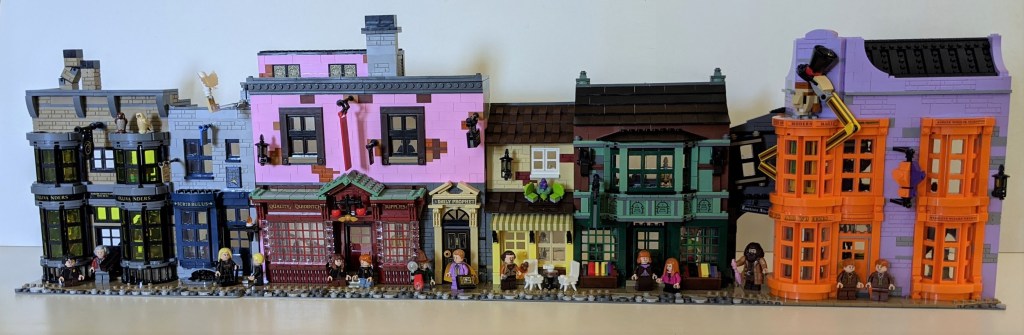
In this final part of the review we get to build one of the most iconic buildings at Diagon Alley, Weasley’s Wizard Wheezes, the joke shop Fred and George opened there after they left Hogwarts. In Harry Potter and the Half Blood Prince, we see it when the death eaters come to capture Ollivanders.

With its location at a corner, Weasley’s Wizard Wheeses dominate the street, similar to Gringott’s wizarding bank. From the Roundtable interview, I learned it was indeed included to be the focal point instead of Gringott, which had been the focal point in the 2011 Diagon Alley (set 10217).
The LEGO set also has the building on a corner, with the entrance to Knockturn Alley on one side of the building and Diagon Alley on the other.
It is no secret that I really love the Weasley twins’ joke shop. It amazes me due to its colours and design, in particular the giant man in the corner window. After having seen it at Harry Potter Studios in London, I decided to build a version myself back in early 2019. I’ll do a comparison between my Diagon Alley builds and the new set later on, and hurry on to complete this review of the new Diagon Alley set.
The build
As mentioned above, this final submodel covers Weasley’s Wizard Wheezes and the entrance to Knockturn Alley. It is built from the pieces in the bags numbered 15-20.
Bags numbered 15
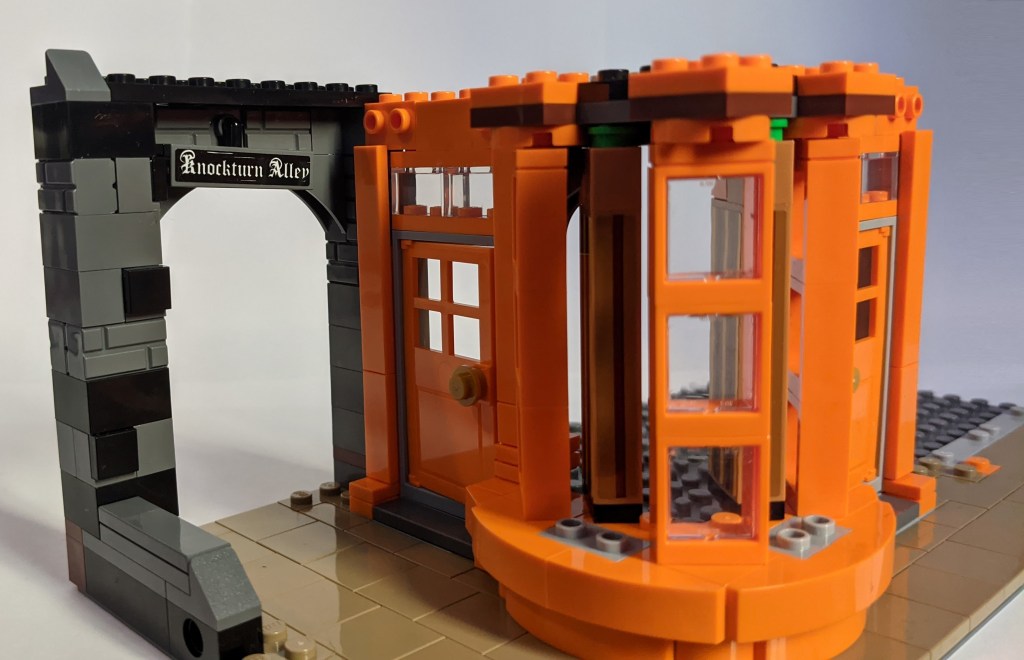
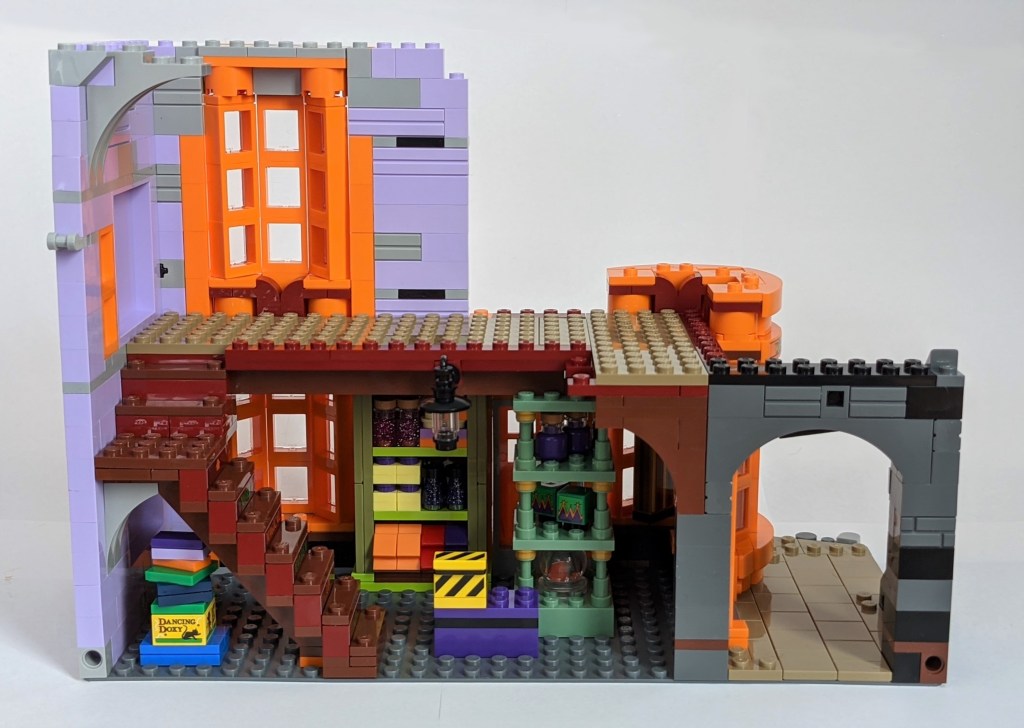
As usual, the first few steps are making the footpath, followed by the foundation to the building itself. Similar to the previous submodel, focus in this first step is on a particular part of the building, in this case the left side of the building with the dominant corner window as well as the entrance to Knockturn Alley. This allows you to see quick progress, rather than ending up with a third of a wall for the entire building.
Here is what the front looks like at the end of the first lot of bags.

Here are a few close-up photos focusing on that left side of the building, showing in particular the entrance to Knockturn Alley and an interior view.

Bags numbered 16
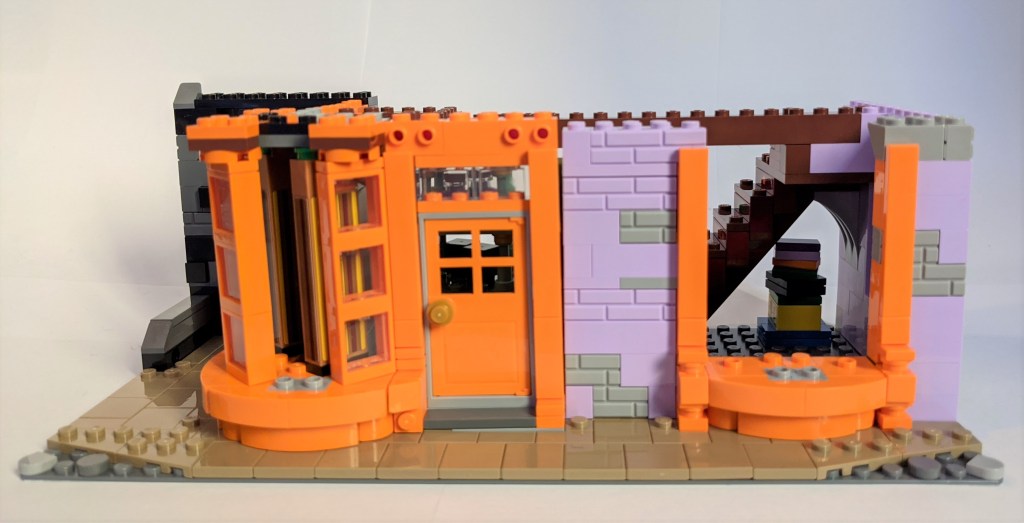
In this part, you finish the remainder of the downstairs walls, but more importantly you complete the downstairs interior.
Here’s a look from the font. It is coming along nicely, but there is still much to be completed, in particular around the windows.
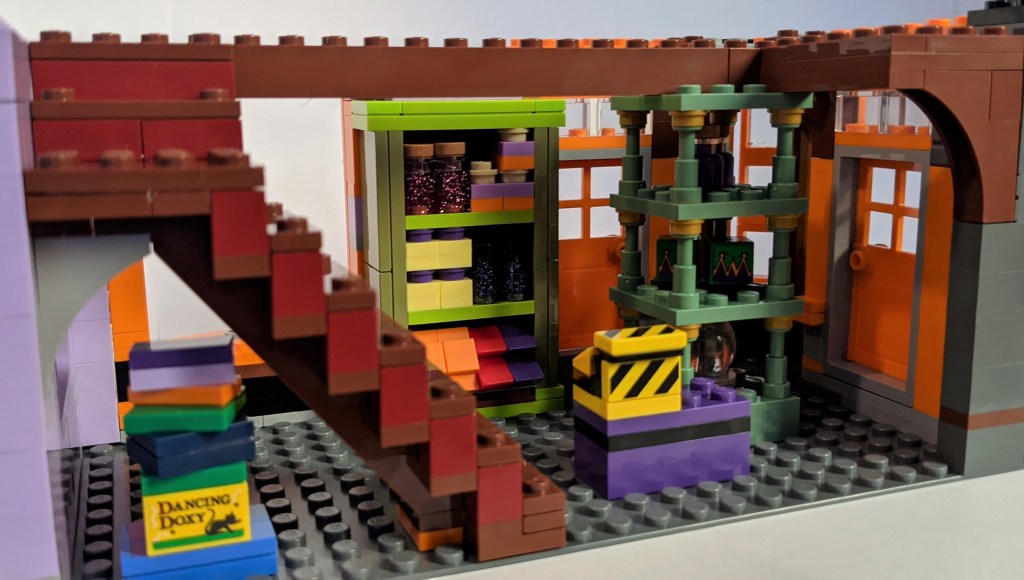
While the front didn’t progress much, a lot happened at the back. And it was a bit slow going, as there were quite a few stickers and small parts to be assembled. But the level of detail is amazing, so it didn’t matter at all. You don’t buy a set like this to hurry though it after all, but rather to enjoy the build experience.
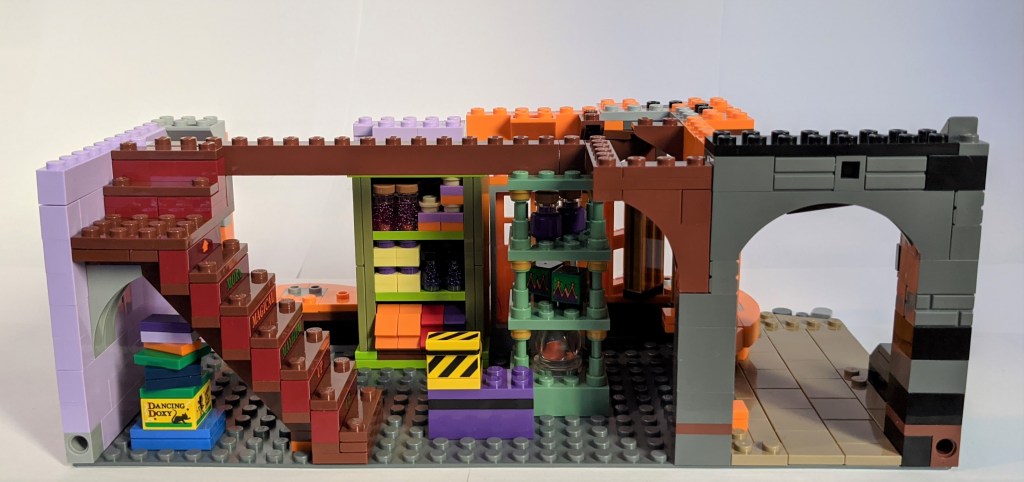
Here are a few close-up photos from the build so far. The focus is on the back, with the interior downstairs now complete.


Bags numbered 17
Continuing on, wanting to finish this last part of the set, I went though the next lot of bags pretty quick. And what a difference it made to the front. The windows in particular have progressed – with the lower part of the iconic corner window now complete and two levels of one of the side windows. Here is a front look.

Focus has been on the front, while at at the back, nothing has really progressed but adding the floor to the next levels.
Here are a few close-ups from various angles. While the front looks perfect with its large windows, I’m not so sure about the side – again having a number of large panels. I know LEGO for decades have avoided stickers that sits across multiple bricks, so it you want a large sticker as those shown on the side, you need a large panel to put it on. But I would have preferred it without. At least the colour should have matched better, with the purple on the stickers being somewhat darker than the bricks.


Bags numbered 18
The next lot of bags gave us the bricks to finish the upper level of the big corner window and most of the walls. Here is what it looks like from the front.
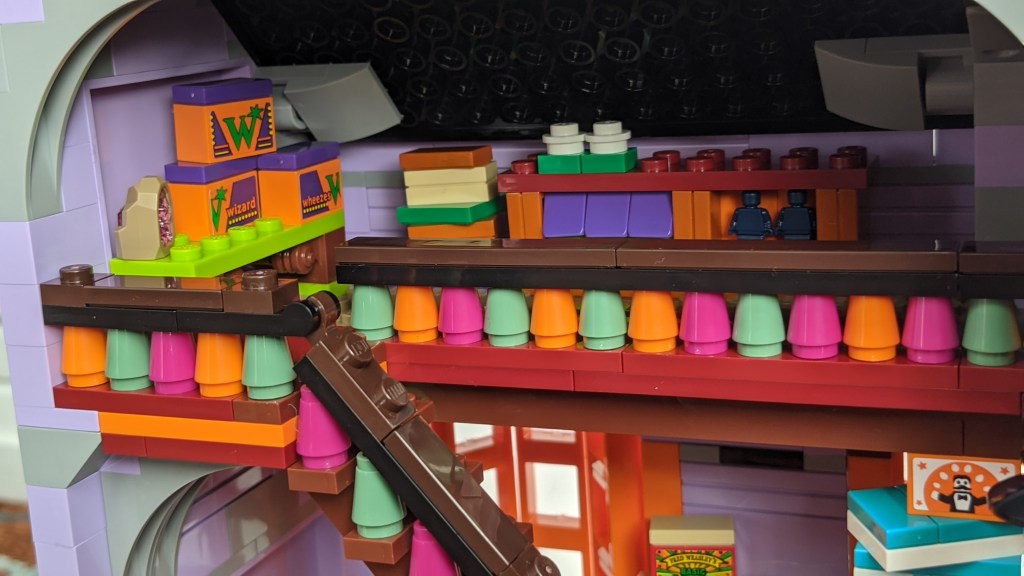
On the back, the most noticeable thing is that the back of the tall figure in the corner window is used at shelves for the twins’ products. In my own version, I had tried to hide the back instead. Making it part of the display is a neat solution.

Here are a few close-up photos, focusing on the new sections.


Bags numbered 19
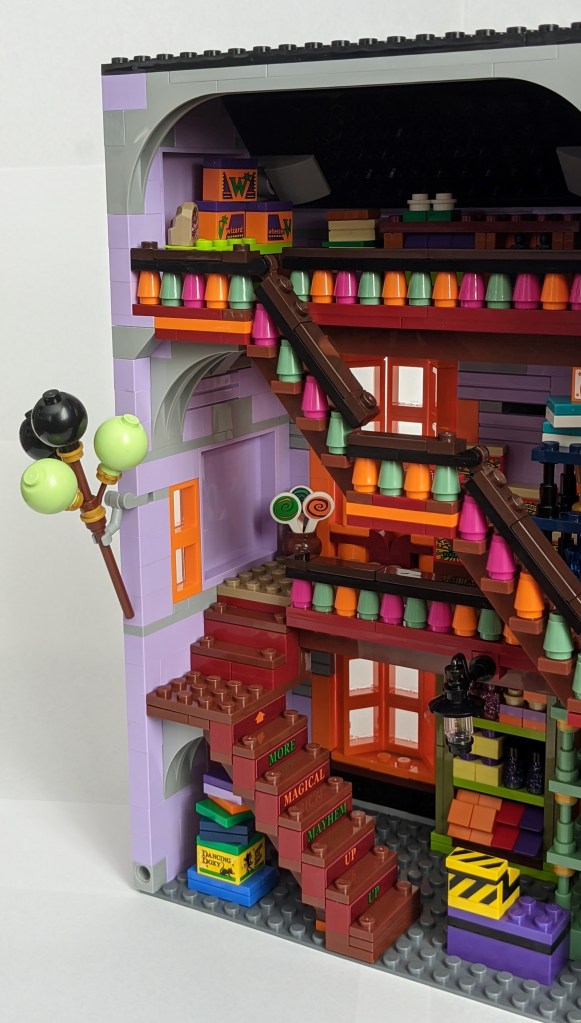
Almost there! It is really taking shape now. All walls have pretty much been completed, including the section above entrance to Knockturn Alley. But otherwise the main addition is the at the back. But let’s first have a look at the front.
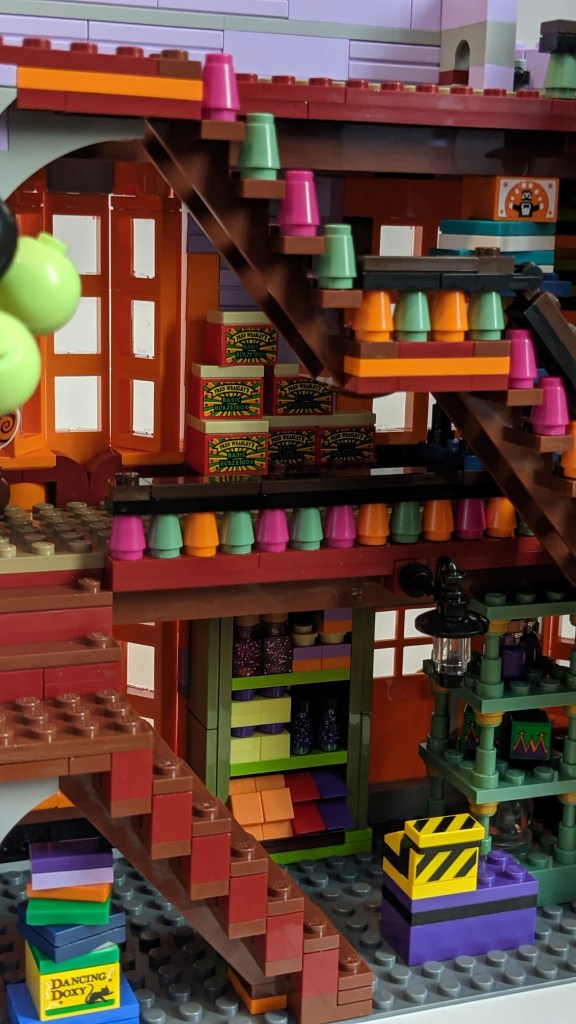
From the back, we can see the middle level has now been completed with interior, including lots of the Weasley twins’ products and a colourful handrail.
Again, I have added a few close-ups from various parts of the building. It is really coming together now. I love the detail within the shop, though it is rather sticker intensive, and many Weasley products could have been done without. But it does add a nice touch.
Also, I really like the off-angle window above the entrance to Knockturn Alley.


Bags numbered 20
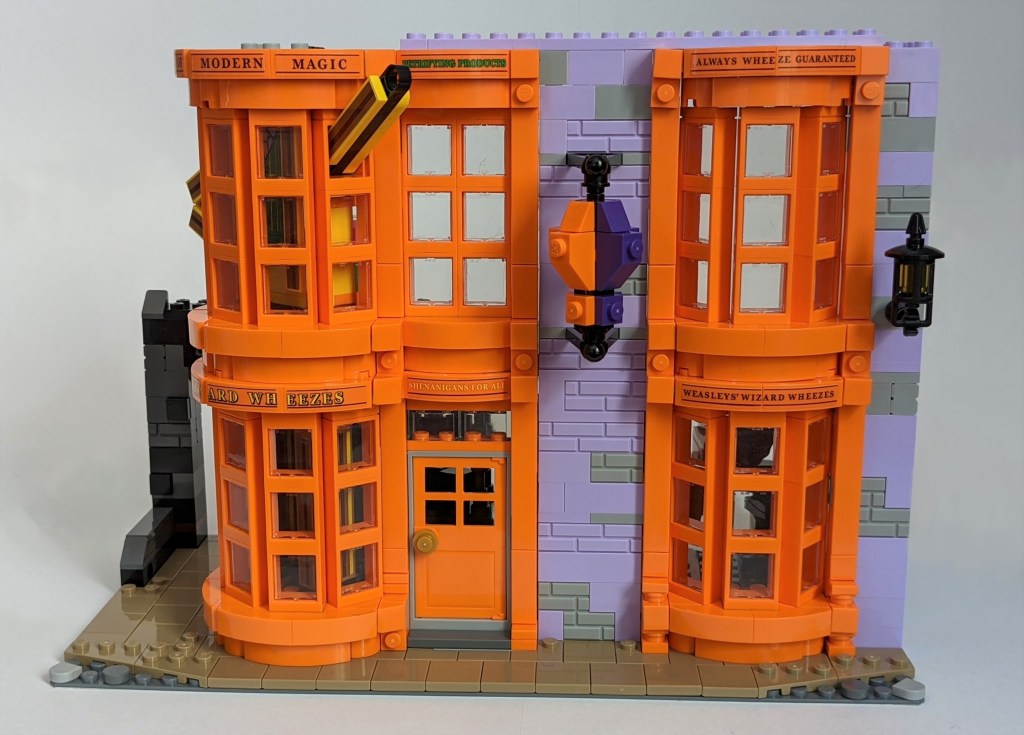
The final set of bags. The roof is now done, and the giant in the corner window has now been completed. Here is the finished model looks like from the front.

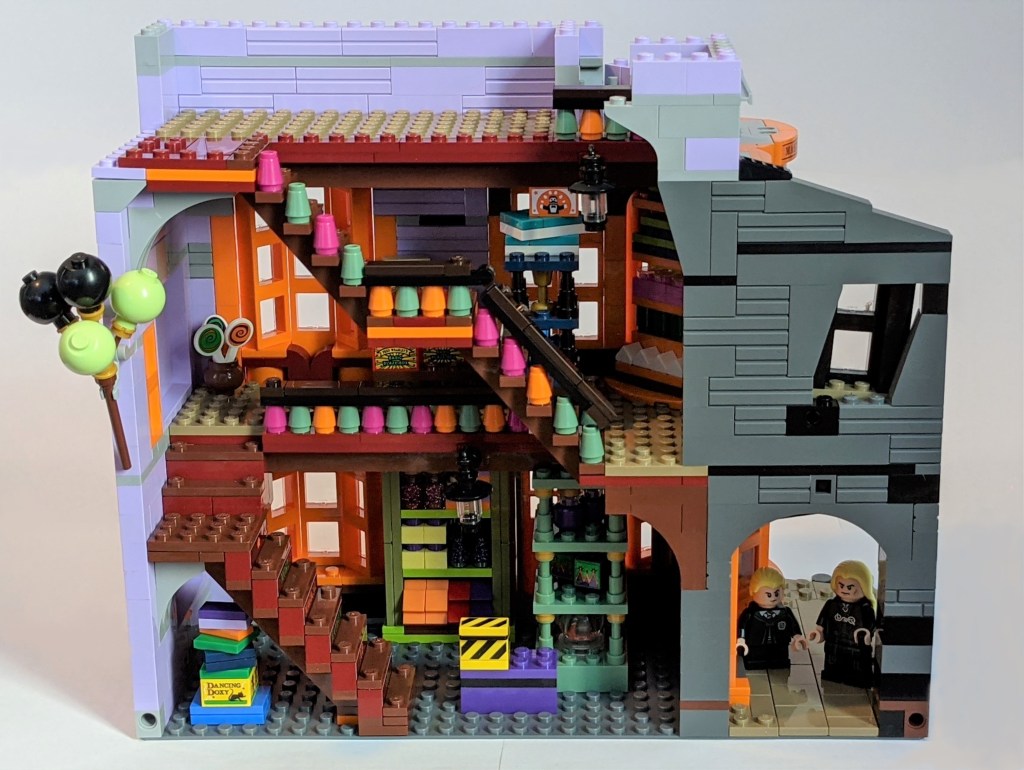
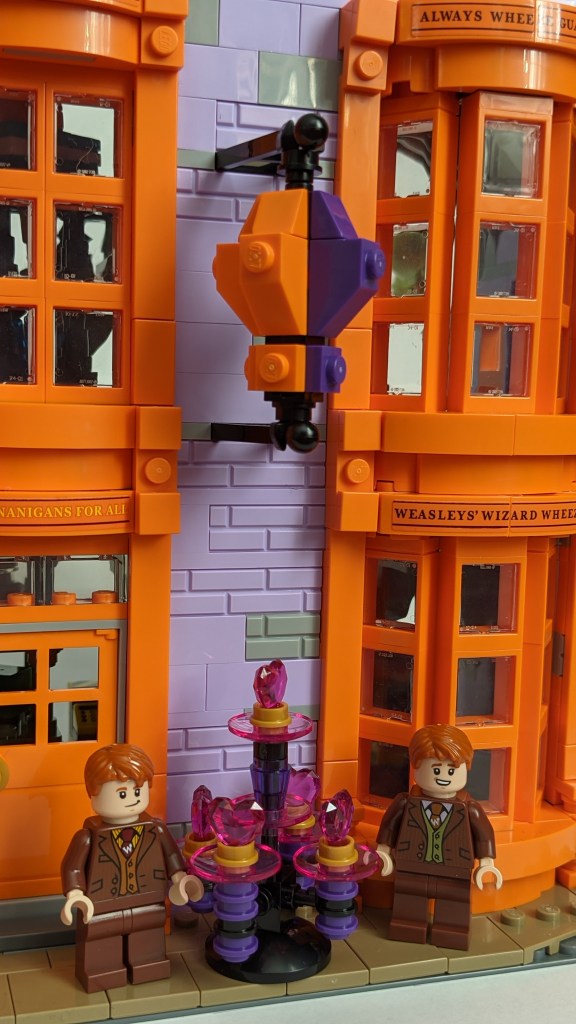
At the back, the handrail has been completed, all the way up to the top level, and with the interior on the level is all done. This is supplemented with a small stand alone model with love potions (see photo above).

Here are a few close-up photo’s of some of the amazing detail of the finished model.

One thing to notice is that a lever allows you to make the giant in the corner window lift off his hat.
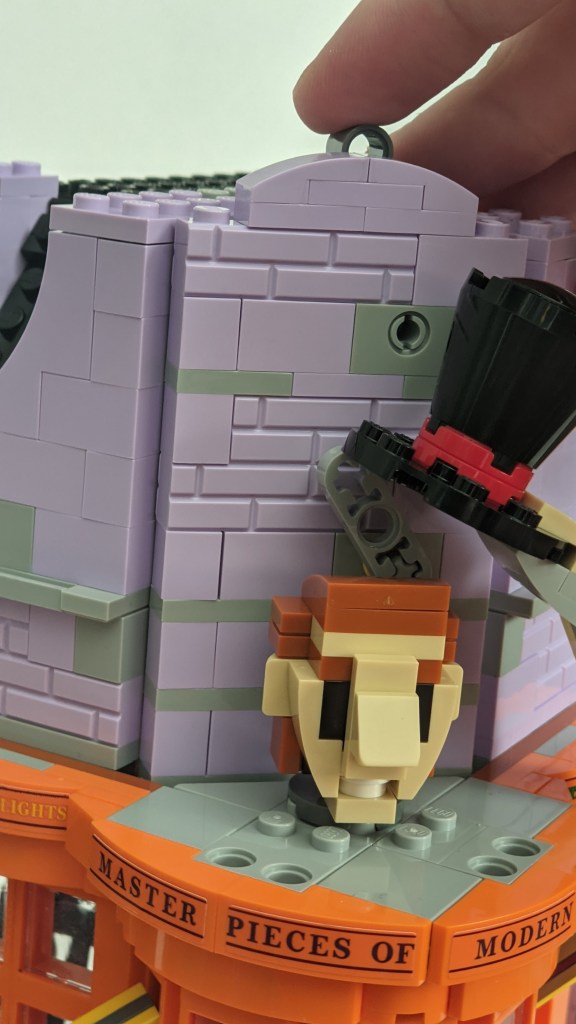
Hat off… 
Hat on…
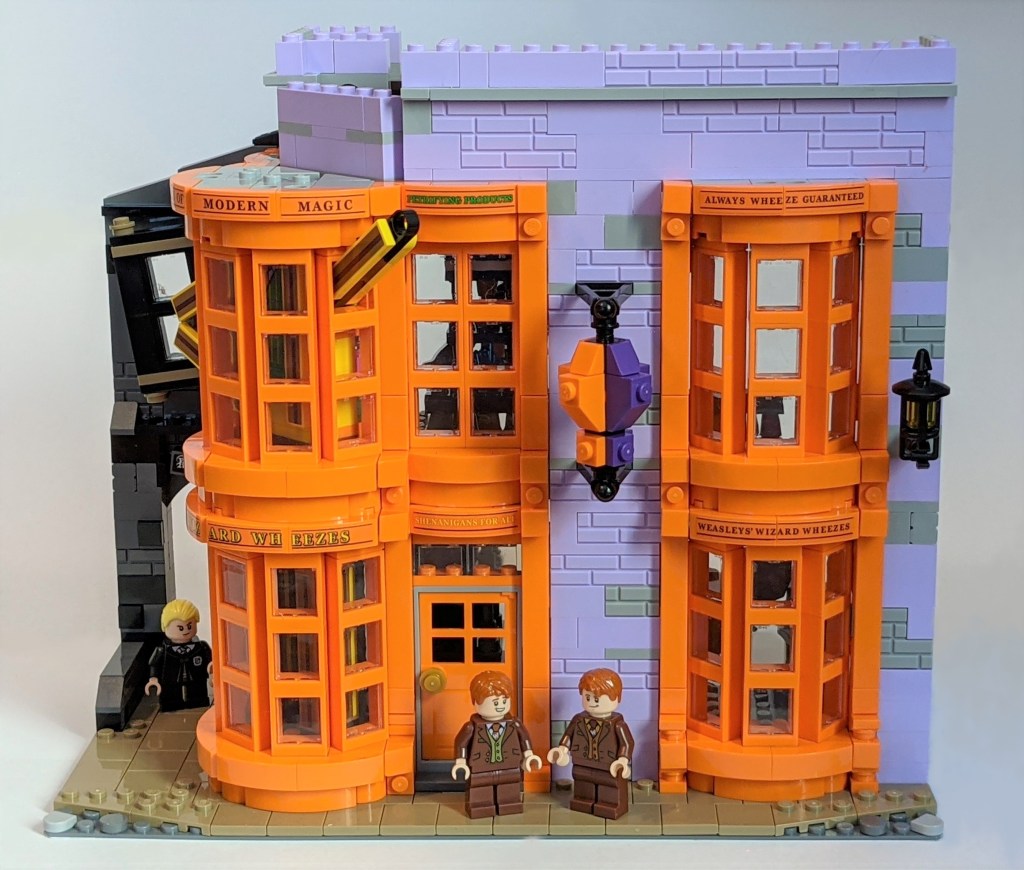
With this, I’ve discussed all buildings throughout the four parts. But before finishing, let’s have a look at all the minifigures included in this set.
Minifigures
The set includes a total of 14 minifigures. That is a lot – but this is to be expected from a set this size (and price).

There are so many minifigures, that they are difficult to photograph in one go and still capture the details. So I’ll do the review is smaller segments.
Hagrid, Harry, Ron and Hermione
First up is the golden trio Harry, Ron and Hermione – along with their friend Hagrid.
The photos below show front view, front view with alternative face print (where available) and back view. The trio all got the same torso (which is printed on the back too), but different coloured kids legs. They also got dual head prints. Hagrid only got one head print (but it would be hard to see a difference with his hair and beard) and no print on the torso back. Harry’s head on one side is all dirty from his misadventure travelling with floo powder.


Ginny, Molly, Fred and George Weasley
Next up is four other Weasley family members, Ron’s mum Molly, and siblings Ginny, Fred and George. They all look amazing with detailed printing. The only downside is the lack of printing of Molly’s skirt piece.


Draco and Lucius Malfoy
The set also includes both Draco Malfoy and his father Lucius. Draco comes in a Slytherin robe, which will be great for creating additional Slytherin figures (like Crabbe, Goyle and Pansy). I hope this torso will become more widely available in future sets.
I really love Lucius’ dress, with the printing of both torso and front legs being amazingly detailed (also, Lucius is the only figure with printing on the legs in this set). It would have been awesome with a silver snake head on Lucius’ staff. Hopefully, we’ll get that in a future set.


Florean Fortescue and Garrick Ollivander
Continuing with Diagon Alley shop owners, the set includes Florean Fortescue, the owner of the ice cream shop and Garrick Ollivander. They are both great representations of the movie actors, and interestingly enough use the same hair piece. Fred and George Weasley are of course also shop owners, but we’ve already covered them.


Gilderoy Lockhart and Daily Prophet photographer
And then there is Gilderoy Lockhart. He is one of the most iconic figures in the whole Harry Potter franchise, so it is great to see him as flesh coloured minifigure (missing that, I did create my own version a while back). He comes along with the photographer from the Daily Prophet. Smile Harry…


But wait, there is more…
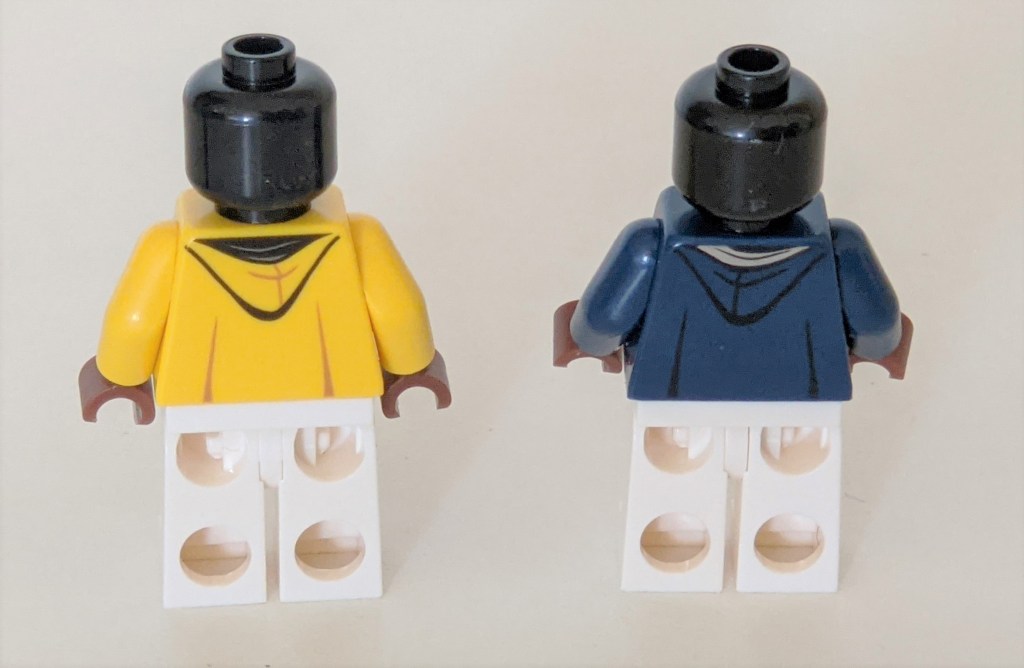
Ravenclaw and Hufflepuff Quidditch uniforms
The set includes both the Ravenclaw and Hufflepuff Quidditch uniforms, which is excellent news, as neither had been released before. Now you can create Cho Chang and Cedric Diggory in their respective Quidditch team uniforms. And as they include legs, torsos and heads, you may consider them “minifigures”, raising the count to 16 minifigures in the set.

Conclusions
So, after all four parts, what is the overall conclusion?
Firstly, I must say the set has a great selection of buildings, where only Ollivanders and the Quality Quidditch Supplies previously has been released as LEGO sets. This is a big plus.
Similarly, the set has an impressive selection of minifigures included. It would have been nice nice with Arthur Weasley too, and in particular Rita Skeeter, the Daily Prophet reporter. She plays a significant role in several books, but never related to Diagon Alley, so it is understandable she is missing. She would be an obvious candidate to a future Collectable Minifigure series – or a Goblet of Fire set. Till then, you can build you own. But overall, you get 14 great minifigures, including some that haven’t been released for a long time (Lucius Malfoy, Professor Lockhart, Fred and George) as well as couple of brand new characters (Florean Fortescue and the Daily Prophet photographer).
Returning to the buildings, I love the diversity in building styles and the level of detail, for example in the very different and typically complex windows designs.
Is it all perfect then? Not quite (though pretty close). One thing I note is that the set is almost too perfect. I would have loved more leaning windows as in Quidditch shop (or better yet, entire walls leaning), more crocked chimneys as on Ollivanders and more angled windows as the one above the Knockturn Alley sign. The set does have a few imperfections as mentioned above, supplemented by the irregular sizes, colours, roof designs, and randomly dotted signs hanging from the walls. But maybe there could have been more.
I know the colours have been a big issue for many with the pink being rather dominant (though it does depend on the lighting). I’ve seen examples where Quality Quidditch Supplies has been rebuild entirely in grey (there is a lot of grey on the street then) or the part of the building above the Daily Prophet entrance was changed into another colour (for example to match the top floor of the Ice Cream Parlour. I think the latter seems to work well, but the designer has been restricted to build consistent with the movies (including photos and unreleased movie clips from the original set) and may therefore not have had that option. Overall, the colours work for me, though I may look at options to tone the pink down a bit in the future.
When I initially unpacked the set, I noted the four sticker sheets and thought it was a bit excessive. But having built it now, I must say most of the stickers does add to the look and feel, and you couldn’t have reduced the number a lot. A few I could have done without are the large stickers on the side of the Weasley’s Wizard Wheezes, where the purple didn’t quite match that of the panels they are attached to.
And I don’t like the use of the 1x6x5 panels that have been used on many of the side walls. In Ollivanders, it was required to allow wand boxes to extend into the hollow space, but elsewhere, I’d much have preferred brick build walls, and would have expected that in a set this price.
But overall, this may be my new favourite set. There is so much to love about this set. I wonder if we will get to see more buildings being added in future years. In particular Gringott’s bank would be a great addition, as would the Leaky Cauldron.
Are you planning to buy it? Consider using these affiliate links to LEGO’s Shop@Home and help to support Blockwarts that way (the price is the same for you, but Blockwarts get a small commission).
Doing this review in four parts has taken a lot longer than I thought (big lesson learned). I’ve got a number of other reviews piling up to be done and a few builds, modifications and other surprises to post too. So check back soon again, this will be a busy time on the blog.
Till then, Build the Magic!

